Hey hey!! If you are just tuning in, welcome to the Rock What Ya Got Budget Bathroom Makeover Extravaganza! Ok maybe the word extravaganza is a little strong, but guys, this is exciting stuff! I’m overhauling our boring builder-grade bathroom on a small budget and using as many leftovers as I can find! All of the previous posts in this series are linked at the bottom of this post if you need to catch up!
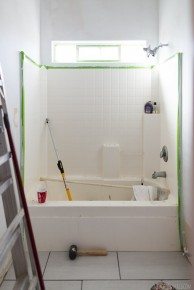
When we last left off, I’d just installed the black penny tile on the wall and was a little unsure about how to finish it off. I thought about using a piece of corner molding, but after thinking about it for a minute decided that the wall needed something else entirely. One thing that we’ve been doing in the house is a V Planking treatment. (I’ve got a MAJOR step by step tutorial coming) but basically you take a sheet of plywood or MDF and cut it into boards that have a 45 degree angle on the ends. Its really quick and easy with a table saw and looks a little bit more decorative than a traditional plank or shiplap style wall treatment.

If you’re doing this project in your house, in order to have it look absolutely fantastic and prevent moisture from building up behind the boards it is critical that you have a good caulking job. Caulking is one of those things that seems straightforward enough. You squeeze out the caulk and wipe off the excess. Trust me when I tell you that its an easy job to screw up. Unless you know a trick. Check out yesterday’s Tip Tuesday for a video tutorial!
One other thing. Would it have been better to do this before we spent time and $$ painting the wall? Heck yes. But its ok do do things a little out of order when you’re flying by the seat of your pants.


We’ve learned that its easiest to prime the boards before you put them up. Then to go back and paint the grooves and wall color after caulking and filling the nail holes.


Total cost for this update was $30 for the sheet of plywood!
I’m loving how this thing is shaping up!! How are you feeling about the resurgence of the plank/shiplap trend?


It looks great! Awesome job.
Looking good!! Thank god for the resurgence of the love for ship-lap! My house was built in the early 1900’s and the entire upstairs is ship-lap. I spent last summer painting it all white (the wood was way to dark) and now my upstairs hallway looks oh so hip 😉
https://www.blackbeigebrown.squarespace.com
Fab As ALWAYS! Keep it Coming!!
IT LOOKS SO GOOD I CAN’T HANDLE IT!
Happy dance!!!!
Oh, can’t wait to see the whole enchilada!!
That’s a kewel looking faucet.
Love the look of the bathroom. Man, I hope it’s waterproof!
Cheers from Germany!
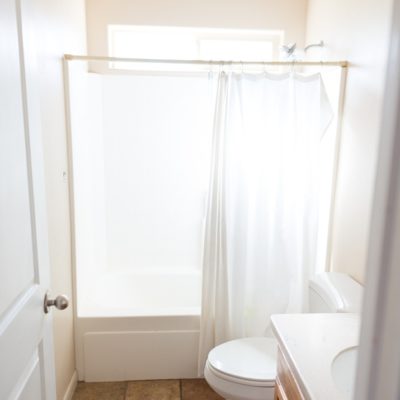
Love the whole look of this, but would REALLY love an overall picture of the finished space. It’s hard for me to get my bearings with closeup shots. Hope a “reveal” is coming soon!
Love the wood look. I’ve been saving money up to do ship lap in my dining room.
My question is, did you leave a gap in between each piece of ply wood? I know you cut the ends at a 45 degree angle, did you cut the top and bottom of each piece ( the sides) ?
Great post! Just found your site and really enjoy reading about your adventures in the DIY world. Keep up the great work.
I can’t wait to see this tutorial. I’m ready to get it started in my bathroom! I always love to see what you’re up to next.