Please tell me that I am not alone in having forgotten places in my house. You know the ones that just never get any love? The hallway leading to my bedroom is totally one of those spots. Its dark, it always forgets to be painted, it never gets any art, its like the quiet geeky girl in the the 90’s movies that just needs a little makeover to shine.
Its so forgotten that I don’t even have a before picture. And I have before pictures of EVERYTHING.
So what’s a girl to do? Well, first things first.
Art.
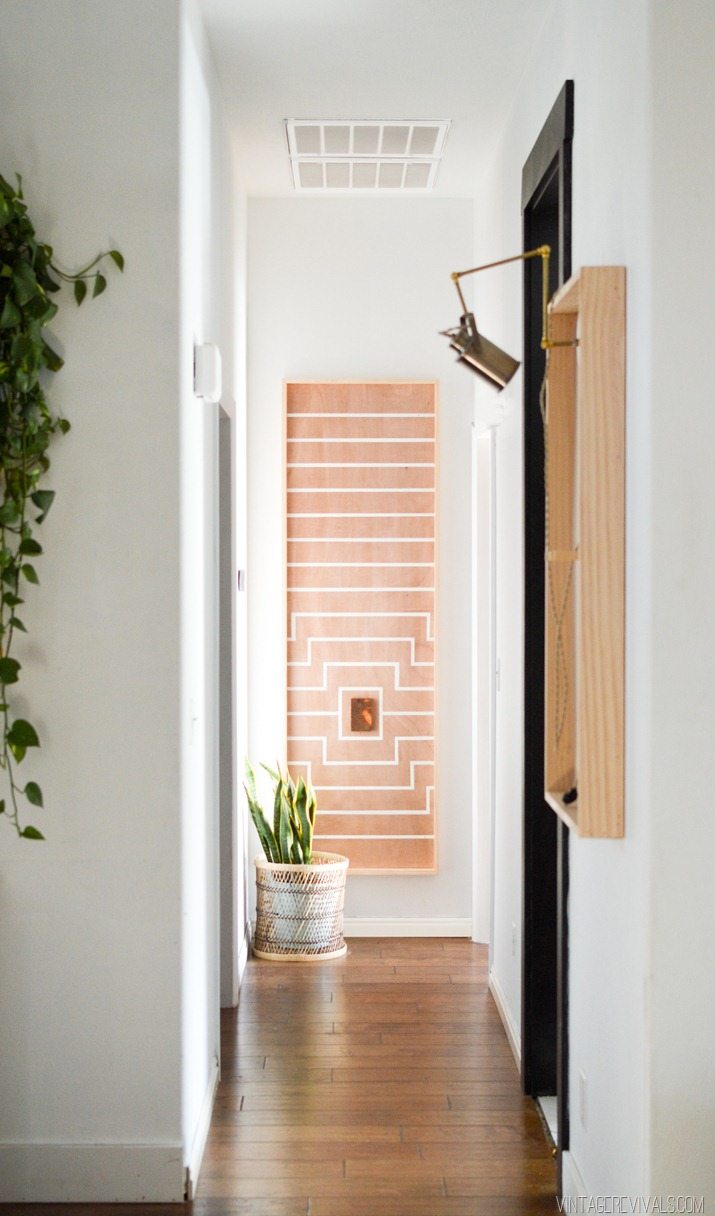
If I’ve said it once, I’ve said it a million times. Art is hard. I wanted it to be impactful. The kind of impactful that when you catch it out of the corner of your eye from the entryway you say “Wow!…mesmerizing…I have to touch it.” & cant help but walk down the hallway to look at it. (Pssst. I have ulterior motives. I figure if I can get them in a trance and that far down the hall, when they glance in my bedroom and see all of the laundry they might feel bad and want to help me fold it. I’ll let you know if I’m on to something.)
Ok so back to impactful. It needed to be BIG! Have you ever seen a 2×7 piece of art floating around Target? Not so much. Of course it needed to be DIYed. (and even if it didn’t, I would have because its my favorite.) So I teamed up with my Scotchblue friends for this fun tutorial.
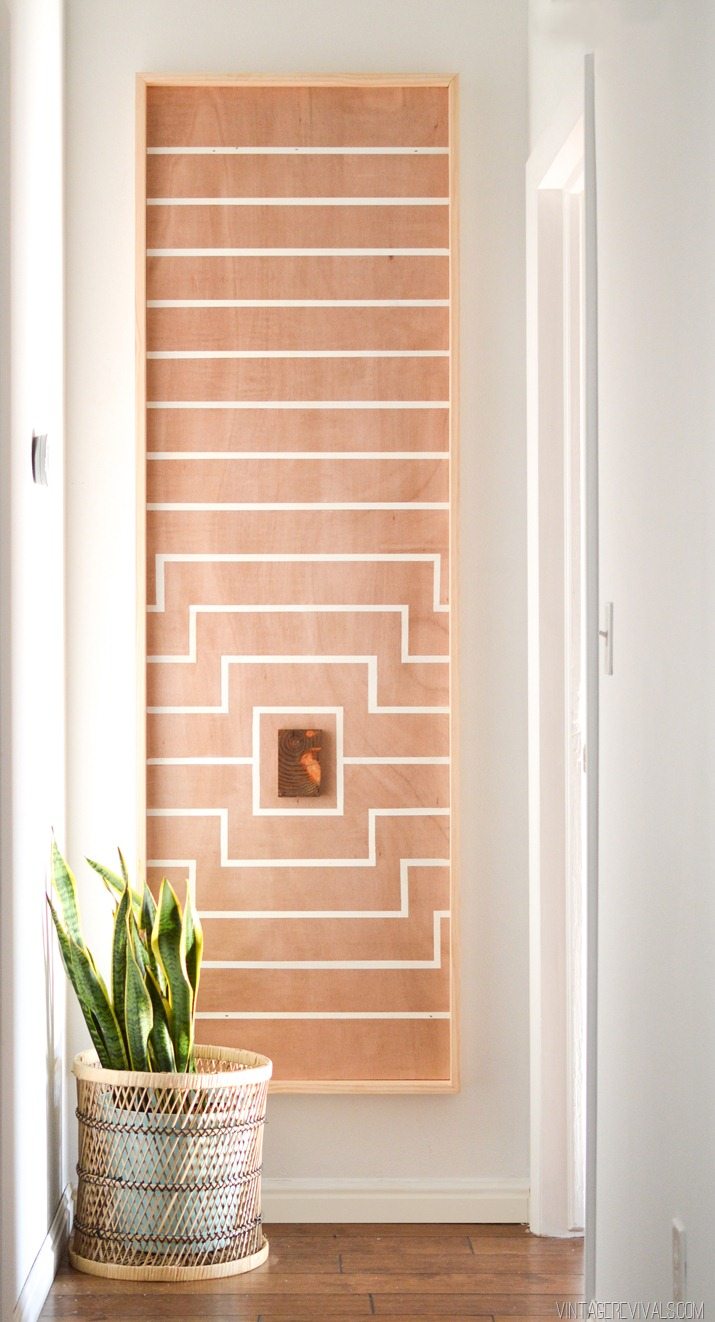
Here’s what you’ll need:
Plywood (cut to size) – this project was 2 feet by 7 feet
3 pieces of 1×3 boards – the length will depend on the measurement of your Ply, mine are listed below.
A small scrap of wood
Paint in the color of your choice – this project used white
Wood Stain
Paint brush
Pencil
Ruler
Razor blade
Nail gun
ScotchBlue™ Painter’s Tape Multi-Surface with Advanced Edge-Lock™ Paint Line ProtectorNote: Follow all ScotchBlue™ Painter’s Tape instructions on ScotchBlue.com for proper surface cleaning and prep, adhesion and removal.
Start by deciding the size of your art. I mapped out a few different sizes and ended up at 2’x7’. I bought a 4×8 piece of birch plywood and had the guys at Home Depot cut it down to size for me (if you have a table saw you can do that part yourself but I always think its easier to have them cut it.) I also bought (2) 1”x3”x8’ and (1) 1”x3”x6’ pieces of select pine for the outer frame.
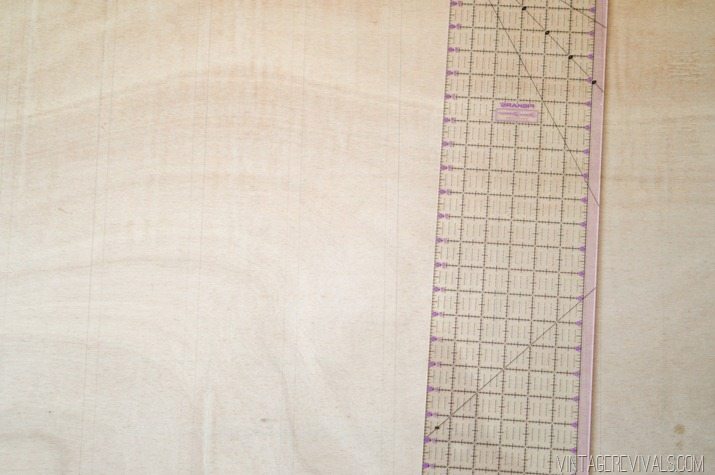
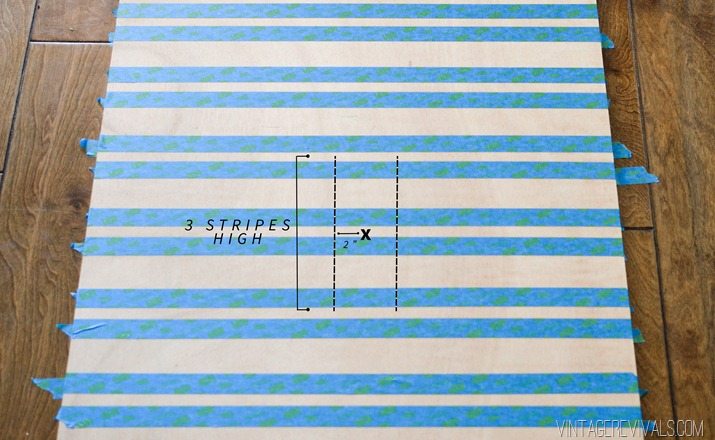
Beginning at the top of the plywood, use a pencil to mark two horizontal stripes, 1/2” apart (this will be your paint line). Repeat until you reach the bottom of the board, leaving 4 inches between each set of double lines. Do this lightly with a pencil (you’ll be erasing some of the marks so a light hand is your best friend!) A fabric ruler makes this really easy.
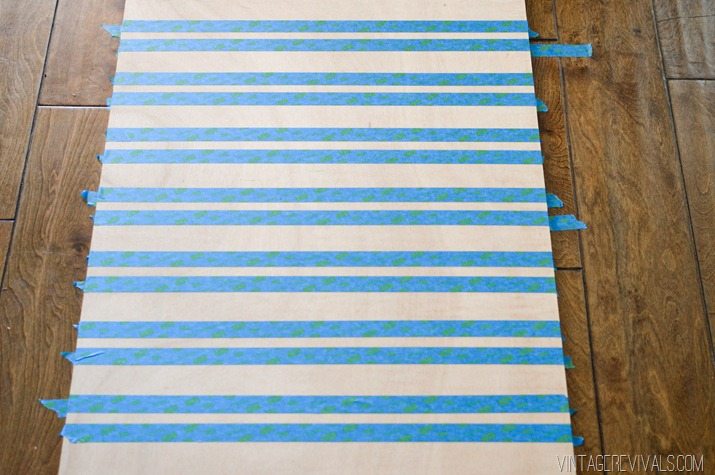
Using the lines as a guide, apply ScotchBlue™ Painter’s Tape along the outside of the marked lines.
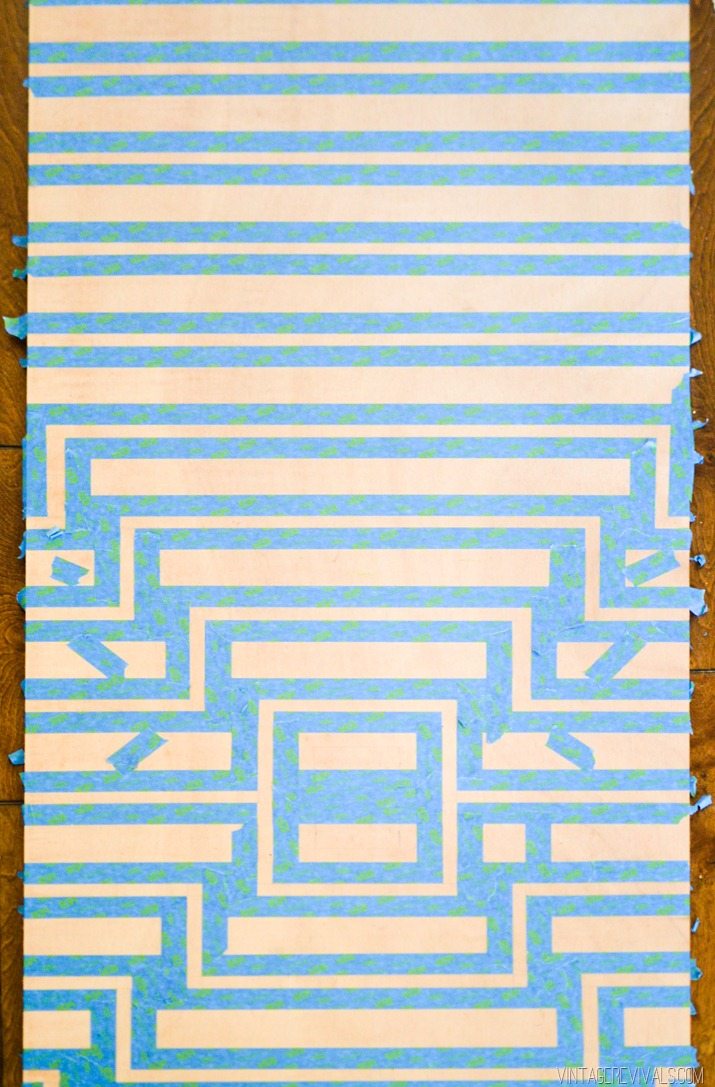
When you have your stripes taped its time to find ground zero, AKA the spot where your ripples start. Approximately three-quarters of the way down from the top of the plywood (feel free to use your own creative interpretation) use a pencil to mark the dead center between the right and left edge of your wood. Using a straight edge draw a vertical line 2 inches away from that mark on either side that extends the length of 3 taped lines. We’re going to call these vertical lines the connectors, just for clarity’s sake.
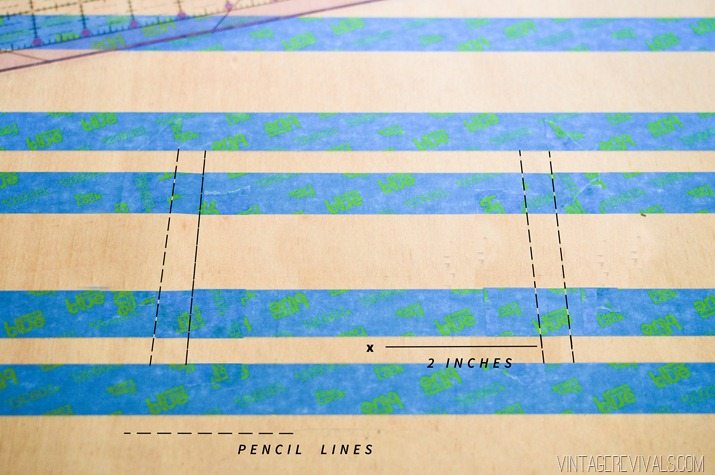
Starting at the line that you just marked (2” away from your center point) measure 1/2” (because that is the thickness of our painted line pattern) and mark a second parallel connector line.
Tape on the outside edges of both of those lines.
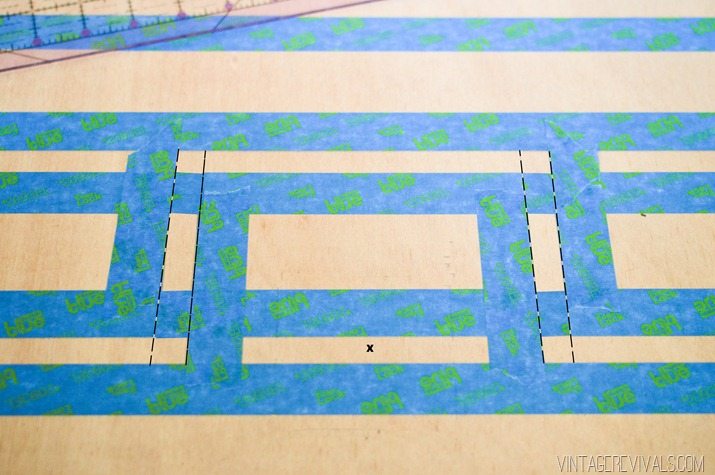
Use a razor blade to cut the tape from the original horizontal lines that crosses into the 1/2” vertical line that you’ve created. When you have the first ripple taped and cut it should look like the picture below.
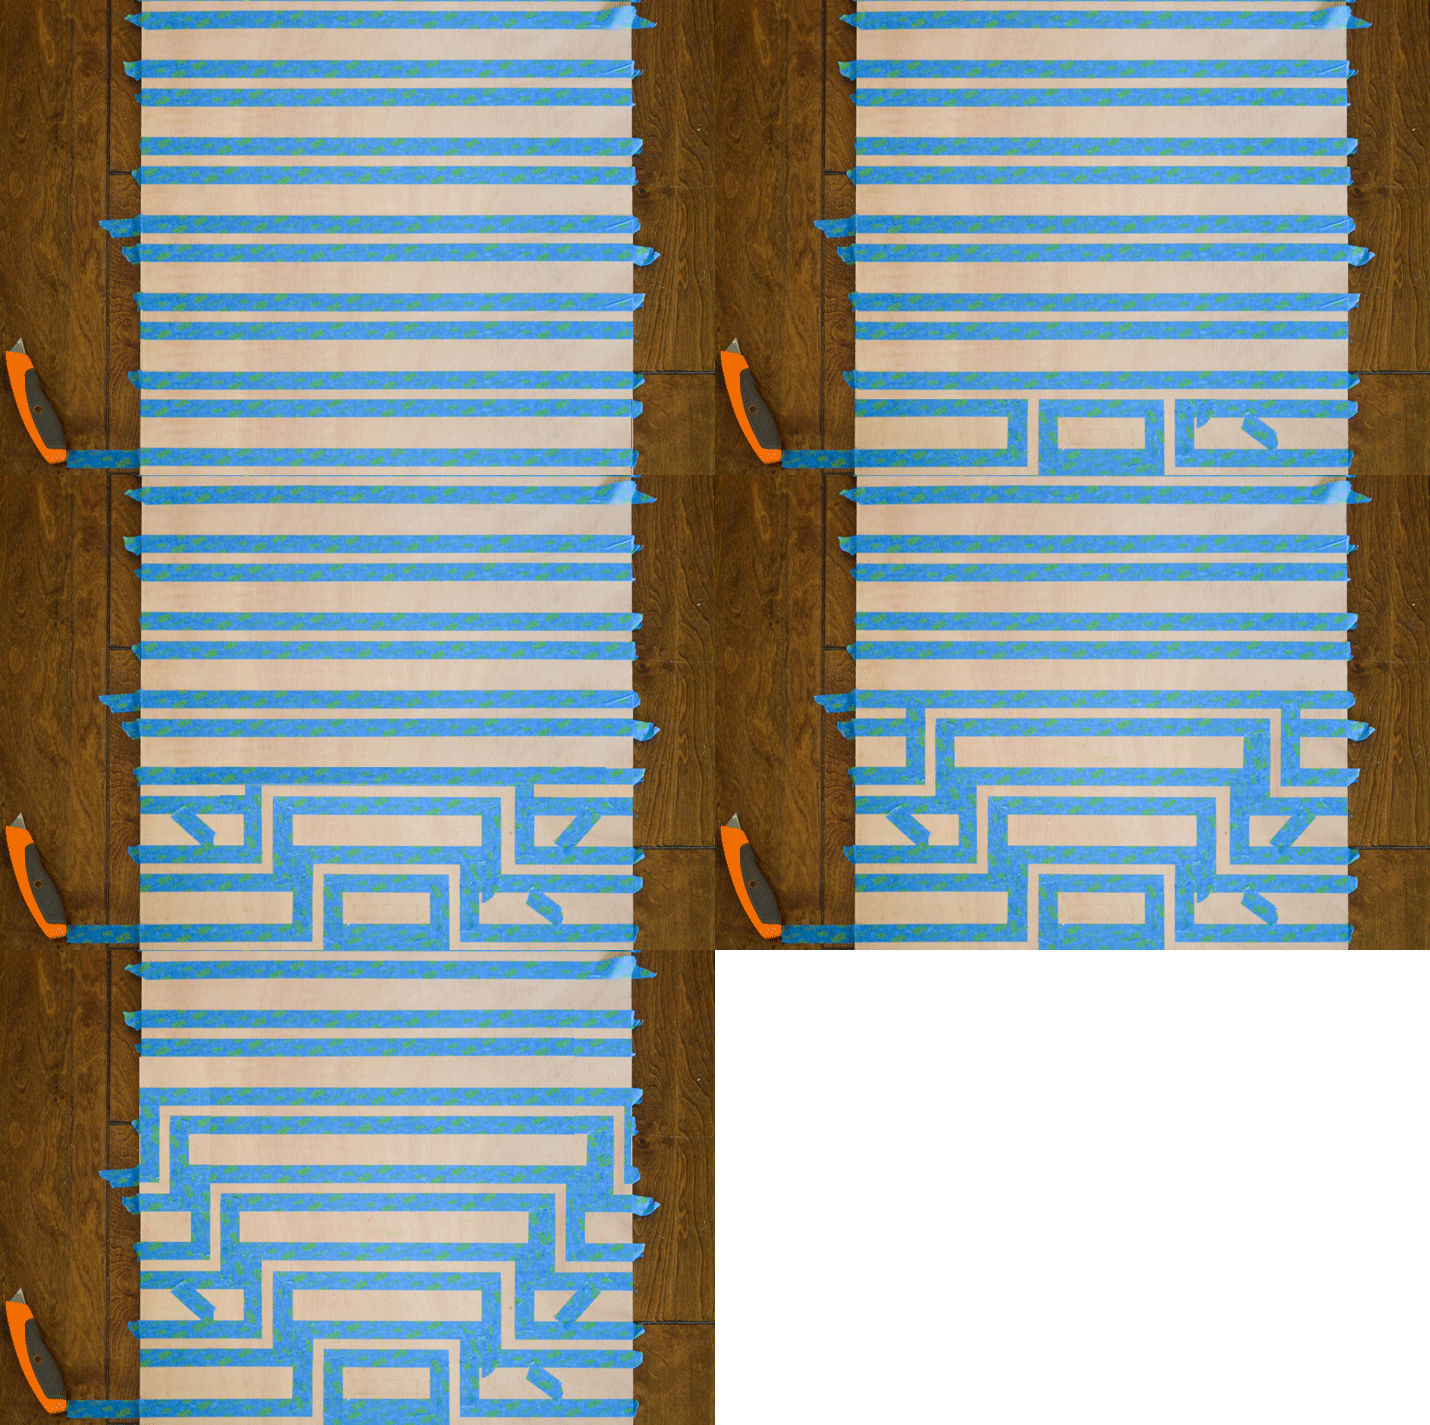
Ok, this next step might sound a little confusing but if you follow the picture AND the words, we just might pull it off!
To make your next ripple you are basically going to measure and mark 2” from the outside edge of the 1st connector line that you’ve created. This will be the inside edge of your 2nd line. Draw a vertical line to the next highest taped off horizontal line. Measure 1/2” (for your design) and mark a parallel line. This is the outside edge of the 2nd connector line. Use a razor blade to remove any tape on the inside of the 1/2” space you just created. Repeat on the other side.
So basically, you are going to measure over 2” and shift up one section for each vertical connector line. Keep repeating this step until you reach the edge of your wood.
Repeat on the other side (you can use your fabric ruler to match the first set of lines that you taped off).
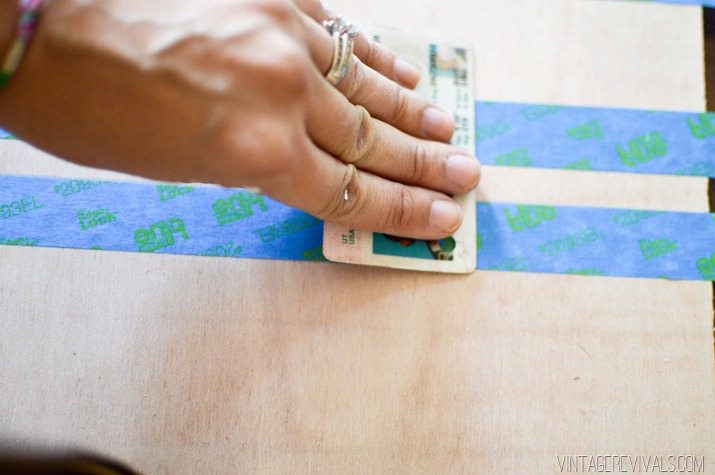
I like to use an old credit card or drivers license to seal the tape nice and tight to the wood. This will make sure that your tape will stay where its supposed to and wont bleed.
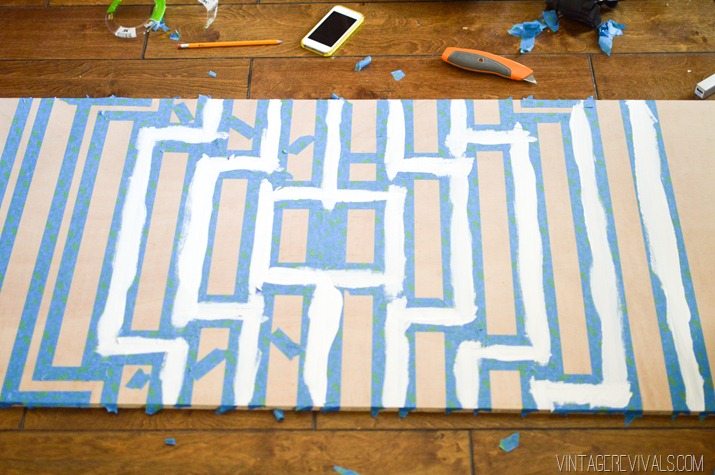
Paint your little heart out! There are about a million ways to make this design amazing, so use your creativity!! (Just make sure that you are painting in the right spaces, sometimes it can get confusing when you’ve been looking at it for an hour!) Once your paint is dry, pull your tape off at a 45 degree angle.
I built a really simple frame by measuring the sides and attaching 1×3’s with a nail gun.
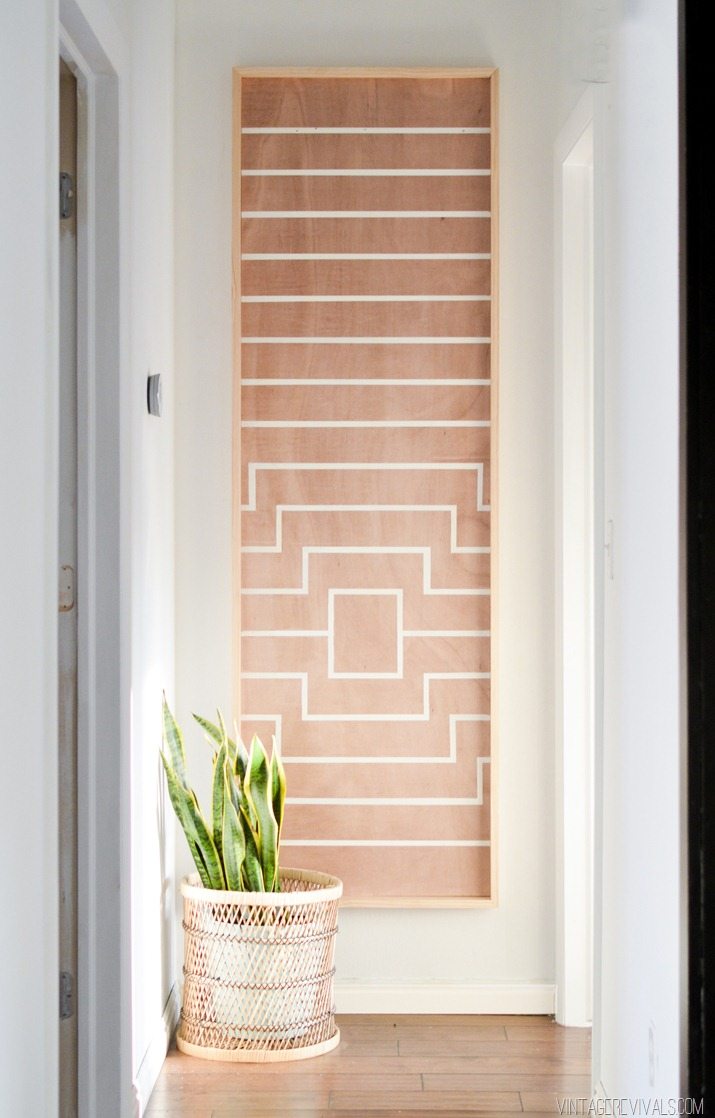
To hang the piece on the wall we marked the studs and nailed directly through the front of the art (on the painted line so it could be touched up and hidden.) I did this for a few reasons, I wanted the piece to be completely flush Second, this is a really big piece and the piece of mind that comes from knowing I don’t have to say “Don’t hit the art!” every time Dyl runs down the hallway is worth filling a few nail holes.
I had originally hung it without anything in the center but I felt like it needed a little oomph.
I grabbed a scrap piece of wood and did a quick stain job after I had cut it to size. I LOVE how it turned out. I love the quirkiness that it has with the crazy knot inside. It was just the dose of personality that the piece needed.
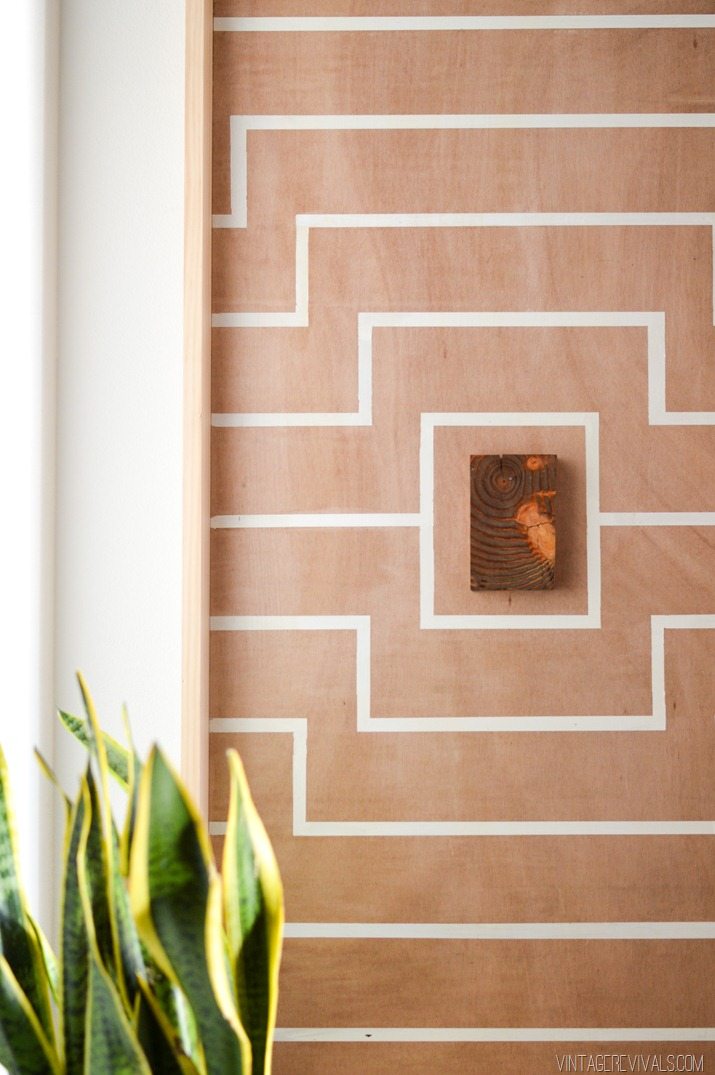
So what do you think? Are you mesmerized enough to come and help me do laundry?!
The hallway still needs some major love, this was like a haircut, we still need the makeup, wardrobe, and the gorgeous but sensitive popular guy to round it out. Stay tuned!
And of course I need to give a massive high five to my friends at Scotchblue for teaming up with me on this project. (They’re the best!)




How fun is this. I love this idea. Thanks for the great tutorial.
Love this! I might be the only one who sees this but the ripples that lead toward the wood chunk makes the piece look almost like a fireplace!
This is great and I’m totally mesmerized…but you lost me at laundry! 😉 Haha!
wow, this is pretty amazing!
This is awesome. Your projects are pretty unique and tutorials are very detailed, Love your projects.
I love this! I thought the middle piece was a rectangle of copper at first, but I love the stained wood even more!
LOVE IT!… I mean LOVE LOVE LOVE LOVE IT!
SHUT THE FRONT DOOR! High impact, minimal work. LOVE it. I have the highest ceilings and this would lovely in our home. But I would turn it sideways at use it as art above my king sized bed! Willing to trade laundry help for art! Funny bc it will be my first trip to Southern Utah this weekend so you think about it! Hahahaha.
Out of curiosity, how did you attach the small block of wood that you added at the end for accent?
Chelsea, you can use a little command strip or small nail, whatever is easiest for you!
xo
m
I have a place for something like this!! That wood block is perfect. Does it look like a bird to you? Thanks for the inspiration
why not just use family photos? this is too much and that random piece of wood in there? cute family photos would look much better than this.
Hater..!? Promote what you love, not what you hate.
Will somebody get the pregnant lady a laundry folder?! 😉
I was going to put up a wall of baskets (basket gallery wall?) at the end of my hallway. That feels incredibly underwhelming after seeing this…
Ok, I will help with your laundry if you help with mine…but my pile is probably twice as big! 🙂 I LOVE this design simple and very pleasing to the eye! The scrap of wood was the perfect last minute touch!
What an eye-catching piece! Love it. The center block of wood reminds me a bit of a belly button. 🙂
Your art is always amazing, but this time you have really outdone yourself. Absolutely love it.
Oh, my God, how do you come up with this awesome diy’s? Amazing stuff and really different from what we see out there on the web. Thanks! 🙂