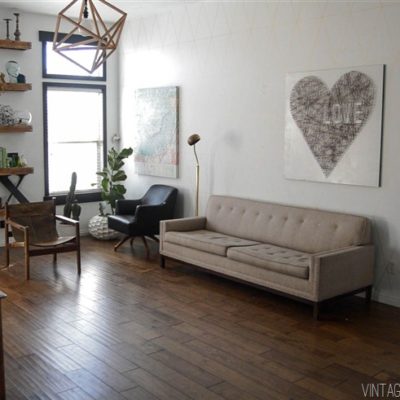
Shelves. They are one of those critical design elements in every space. I mean, there are just so many things to put on them! Right!? When I was working out the design for my living room and entryway, I knew pretty quickly that I wanted shelves in the entryway full of plants.

The original idea was to put the shelves on the wall that you see right when you walk in the door. But when we got a few installed it just made the walk space too tight. I knew it was going to be tight, I just needed to see it for myself. Being stubborn is one of my best qualities. Sometimes.

The obvious move was to bump them to the other wall in the entryway. Because plants. And also no one would hit their head. So its a win win!

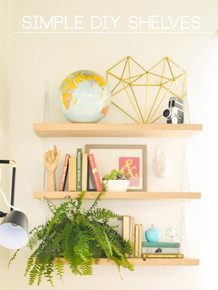
Lets chat about the shelves themselves. Have you seen these ones that Anthro used to sell? Gorgeous. Amazing. Unavailable (and expensive). Just a few ingredients in the recipe for a perfect DIY project.

The hardest part for this project was tracking down the copper sheeting. Hello. If you give me a measurement thickness that means like nothing. Do you know what 3/342 of an inch is??! Cause I sure don’t.
After a fair bit of research I came across Basic Copper. They are flipping geniuses. On their site, they have a thickness guide with videos so that you can actually see what the copper looks like, how it bends, and how it cuts. I ended up buying a roll that was 24” wide x 20’ feet long and the copper was 5 Mil thick. I overestimated on how much I would need and was originally planning on making 5 shelves (it would have been the perfect amount for 5) and I am super glad that I did. #learningcurve
The first thing that you are going to do is construct the actual floating shelf. I used 1×2” sandwiched between 1/2” MDF that was cut 10”x36” Use wood glue (I love Titebond III) and screws to hold everything together. I laid the 1×2’s so that the long side was against the MDF.
The next step is to build the inner support. It has to be able to fit in the hole that you created in the back of your shelf, so you will use 1×2” for that too.
Measure the length of your opening (it will be about 4” shorter than the length of your board) then attach 3 boards that will run the width of your shelf. This helps support and stabilize it.


When your shelves are built its time to wrap them in copper!
Just a word of advice, you will 10000% want to use gloves while you are handling this because it will cut you faster than you can say your favorite cuss.
Measure the distance from the back of your shelf, all the way around the front and onto the back of the other side, and trim your copper. Leave just a small overhang on the sides, they don’t need to completely cover the space because we are putting a trim piece on the front. Try really hard to shape around the corners as you go.

Then you are going to use a staple gun to attach it. You might need to lower the pressure if you are using a pneumatic gun so that the staple doesn’t go all the way through the sheeting.
If the length of your shelf is longer than the width of the copper roll you can do what I did. Put one piece on, and then on the second piece fold the edge over before you attach it. That will give you a finished edge for your seam.
Now for the trim piece. Measure the height of your shelf and add 1/4”. Use a straight edge, a fabric cutting guide is PERFECT for this project and measure so you have 1/8” poking out. Carefully fold along the edge.
![]()
Then place your straight edge on top of the fold and tap it down flat with a hammer.

You can find teeny copper nails at Home Depot. I used 1 package for each shelf. Space them about 3/4” apart.

When its time to mount your shelf, use a stud finder and secure your brace piece onto the wall.


Then slide your shelf on.

Attach the shelves with finishing nails or screws.


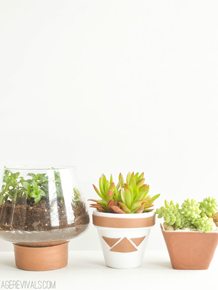
Shop my favorite planters below and check out the other tutorials in this series here!
[show_shopthepost_widget id=”683318″]


Awesome! Do you think that stuff would work as a kitchen backsplash?
TOTALLY. It would be so cool, and I bet it would get some pretty fantastic patina on it.
xo
m
LOVE, LOVE, LOVE!!!
Golly. Those are pretty. And with all those green plants, they really shine!
3/342 of an inch! lol, lol, lol!! genius in these shelves also, is that you did them in graduated size. beauty! and i would have done it small to large without even thinking, but of course it makes all the sense that you went the reverse. they are perfect. thanks for sharing! (btw, i can say my favorite cuss pretty dang fast.)
And now you have me looking all around my house trying to figure out where the heck I can put a bunch of shelves full of plants. Love the copper!
Where did you get the chandelier???? I love it!
I love the detail that using the little copper nails gave to these shelves. The copper is also a nice compliment to all the greenery!
Can’t say I’ll ever try this tutorial out because my hands never stop bleeding once they’ve been sliced and I have no patience, but these shelves are epic! Maybe we’ll get lucky and target will see, recreate, and offer similar shelves for cheap? 😉
Genius! These look amazing. Love the look and warmth of copper. Definitely going to keep this DIY in mind.
https://charmystique.com/
Love the copper as a backsplash idea! I’ve been wondering for a while now what your kitchen looks like… Any chance you’d let us all have a peek?
Love your blog, love your style, love your guts!
I can do this! Thank you for the inspiration Mandi. How are they holding up so far?
I have no words but I am trying to come up with some …
(went to on-line dictionary/thesaurus , they gave me “amazing”)
I will use my own … *Sick*Bad to the Bone*Plum Toe Up*
Girl, you make projects look effortless.
So much so, I am actually going to attempt this.
Thank you for the inspiration.Amazing DIY!
Absolutely amazing results! I always love the bright copper on white, and with those plants… just gorgeous! Need need NEED!
This looks amazing! Great tutorial. I saw this on Pinterest and popped over to see your blog, I will definitely be coming back. Love your style.
Looks awesome! Just to clarify: “attach the shelf with finishing nails or screws” … where? On the front/bottom or side of the shelf into the brace piece, I’m assuming? Couldn’t quite locate a screw in the pictures but then again I may just be totally missing something super obvious! Naturally if I did this project the whole thing would come crashing down.
Hey Kat! Good question, I should have made that more clear. It is attaching them on the top and the bottom all along the piece that is secured to the wall to hold it in place. Hope this helps!
xo
m
Aaaaah those copper shelves are gorgeous! I wish I’d read you post BEFORE I went and DIY-ed my coffee table with gold leaf. Oops. Now I feel like my gold and marble furniture is so dated. Wonderful DIY, I’m new to your blog and can’t wait to check out the rest of your projects! x
Jasiminne | Posh, Broke, & Bored
Mandy: What’s up girl? I check in daily — multiple times a day — looking for the refresh blog you’ve been talking about. I think you had 2 posts in 10 days??? Copper shelves are cool doe. Love your aesthetic. Want to relish in it ever-ee-day!!!
I imagine that you could attach the copper to the floating IKEA shelves? I have a few kicking around the house and it seems that would save me from constructing the shelves in advance!
Thanks for the brilliant tutorial. I love your blog and your inspiration
This topic is so timely, since I always need shelves, but especially because I am exploring using copper as a focus material in home decor and organizing. The information on where to get, and how to choose, copper was invaluable. Years ago (close to a hundred) my grandmother used copper and wood to make a fireplace screen (that family members still use) and photo album, that I still treasure. Seeing below that you have a dyed macramé hanger touches on two of my favorite mediums, dying and macramé. Look for me to post a link to your website on my website. This stuff is so fine!
Love this, would suit my modern townhouse entryway! The copper is quite pricey, you must have used quite a bit for the 3 shelves. Do you think it would look completely cheesey to spray paint with copper? Maybe even add the little nails? The entry has a black tile floor, white walls, and natural maple steps leading upstairs from that entry to the main floor. Maybe leaving the shelves natural would be good???
Hey, love this. How much did this cost you to do, roughly? I know costs vary so much… But just for an idea. Thanks!
LOVE LOVE LOVE these!! Definitely going to try to incorporate them into my next apartment!
Those shelves are downright gorgeous!!
I love love love these shelves! I tried to convince my husband to let me do copper counter tops in my laundry room recently but after researching maintenance it seemed a little more than I wanted to keep up with. Did Basic Copper have any tips for maintenance? Of course I would be okay with them looking old and vintage-y too, though! I showed this to my husband and informed him since we didn’t do the counters in copper he will have to help me make these shelves! Thanks for the tutorial and source information. I love when I visit a pin and everything I need to know is actually there!! I have visited your site several times following pins and I really enjoy all your projects.
Love these!! I am falling hard for copper right now, and these are a GREAT DIY project! Thanks for putting this tutorial out for all of us. 🙂
Can you re-post the link to shop the planters you have? It isn’t showing up for me 🙁
Could you e-post the link to shop the planters you have? It isn’t showing up for me 🙁 [2]
Hi Mandi.
It’s not an easy DIY (not for me), but it looks pretty good and it’s unique, love it1
you mention “patina”, do you mean blue/green or black/brown? the copper you used is not coated to prevent tarnish? I have had copper shelves like these in mind for a while, yours are beautiful … I plan to use gas pipe for the supports