I am absolutely in love with this DIY Geometric Wreath. It’s a tutorial that I pull out every time the holidays come around because it works with any style of decor! You can hang this wreath on your wall or on your front door. It is a quick and fun project that you can do in under an hour!

You know when you are so inspired by something it is all you can think about!? I want to Himmeli everything.
What is Himmeli?
Lets back up. You are probably saying “Himmeli?” Lets. discuss. Himmeli is a traditional Scandinavian art. They typically make them at Christmas time and they are the most gorgeous mobiles that you have ever seen (Google it!!)
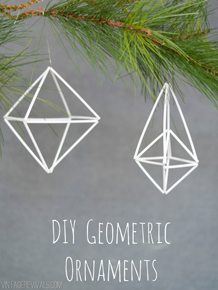
The wreath and how to make something similar lived in my every thought for days. After trying my hand at making simple Himmeli ornaments, I felt like I understood the design process a lot better. Looking at a 3 dimensional object 2 dimensionally is enough to give you an aneurism. After trying a few techniques I feel like I came up with an extremely easy technique to make a geometric wreath.
(And when I say easy, I mean my 10 year old can do it. So you can totally do it too!)
Tutorials for this type of project are notoriously confusing and make you want to give up on life completely. I am doing everything I can to combat that problem. Please don’t give up on life.
How To Video
I even made a video because, lets face it, sometimes it is just easier to learn things in person.
But of course I had to do a regular tutorial too. So lets get to it!
Himmeli Wreath Supply List
You can also purchase a brass wreath kit from the Vintage Revivals shop!
Start by cutting your straws down to right length. To make a wreath that is 19 inches at its widest point I cut the straws to 4 1/2 inches.
The fastest and most efficient way to cut 105 straws is to use a rotary cutter and a guide.

Before you get started I have a few tips:
- When you are connecting the wire you will only need to wrap it once (unless you are finishing a line, then you will want to wrap it a couple more times.)
- Tuck in as many of the tails as you can (I talk about this a little bit more in the video)
- Handle this like it is a newborn baby flower. VERY carefully. Straw is not the strongest material on the planet.
Now is the fun part.
Making your wreath sections
Step 1: Measure out 2 1/2 arms length of wire.

Step 2: Thread 4 straws on the wire

Step 3: Twist the wire together to form a diamond with the straws

Step 4: Add 2 more straws to the wire

Step 5: Twist and attach the wire at the opposite end of the diamond

Step 6: Continue adding 2 straws and twisting them until you have a shape with 5 sections.

Step 7: Feed the wire back through one of the straw sections so that it is coming out of the elbow

Step 8: Add one section of straw to the wire

Step 9: Connect the wire to the elbow of the next section

Step 10: Repeat until 4 or the 5 sections are connected and you have a shape similar to Pacman

You are done with your first piece!! Now you just need to make 7 of these PacMan/Pentagon shapes. After you have done that, this is where you pick up the tutorial.
Step 11: Connect the open space to the side of the next space by threading the wire through the straw in the second piece.


Step 12: Secure the wire to the corner of the first piece.

Step 13: Connect all 7 shapes together to make a circle.

Step 14: Add 2 Arms Length (approx. 10 feet) of wire to the center point on the face of one pentagon. Thread a piece of straw on the wire and connect it to the center of the next pentagon.

Step 15: Connect all the center points together

Clip your wires and you are done!
One little tip, if you are planning on spray painting your wreath string a small piece of wire from one of the outer points so you have something to hold while you are painting! (I used this gold to paint mine!)

Just an FYI the center wreath in this picture is a different design. The 2 wreaths on the outsides are from this tutorial. You can find the tutorial for the middle one here!


And because I am obsessed I have one hanging in my kitchen too…


So what do you think? Is this a project that you are going to try? Get the brass kit here!


Love them!!! I haven’t even watched your video yet but your pictures seem to make so much more sense to me that I think I may give it a shot. How-ev-er, I am really digging the center wreath you made. Any chance you’ll share the pattern for that one???
Love, love, love! Great job! So beautiful.
I can’t believe how easy and stunning it is! Thanks for the tutorial!!
This wreath is stunning!!! I can’t get over how amazing it looks and that it’s a DIY project. I will have to make room somewhere in my loft to make & hang this. Great project!
What a cute idea. I have to make one ASAP! Thank you so much! I love this!
What a great tutorial! Thank you so much!
I love these so much my brain hurts! Please tell me that light in your kitchen is a tutorial that is coming up soon. I am looking for something just like that for my dining room to hang near an old set of lockers! Lowe’s has something similar for $20 with a red cord and it’s out of stock until almost February!!
Love, love, love! Wondering if you could use any of the cute new decorative type straws for this? Does it have to be cocktail? There are so many adorable ones out there now – just curious!! I cannot wait to try this! Thank you for the video – I need all the help I can get!
You can use any type of straw! I love cocktail straws because they are so skinny, but regular straws would be so great too!!
Love this!! I am going to make one for my kitchen to leave up for all times. I’m also super-digging the middle one; any chance we can get at that one too?
Thanks!!
T
I think I’m in love! Thank you for the tutorial– I am going to make me up a whole passel of those babies!
Love this! I’m going to make one to hang over the top of a mirror I have hanging above my fireplace. But I will probably leave it hanging year round because I love the look. Thanks for the awesome tutorial! You explained it so well and it looks pretty simple. Can’t wait to give it a try!!!!!
How fun that such simple materials can produce such a beautiful wreath! So festive!
I can’t decide if I love or hate that you are letting Himmeli out of the bag. Now I won’t be the only person around here who has it 😉 FYI…if you cut both ends of your straws in opposite 45 degree angles then your angles will fit together beautifully and the finished product will look extra polished. You did a great job!!
Loved it so much, I made two today! Your tutorial was so easy to follow and very well done. I would also love to make the center wreath as well. It looks like it might be 9 individual pieces, but with all the sides completed and then wired together??? Thanks again for the tutorial; I am a newer reader and am loving your blog!!!
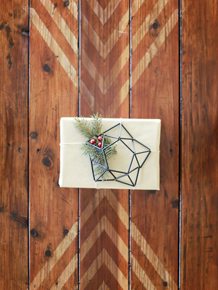
These are too cool! Until I actually got around to reading the post I thought they were string art, but no- they are WAY cooler! Love!
-Becca
Ladyface Blog
Holy shiz balls Mandi! Where do you come up with this stuff?! You are blowing my mind over here!
What a neat idea!
love this!!! i love watching the videos!
Thank you so much! I have been dreaming of the Hruskaa wreath but my wreath budget not exactly booming. I’ve already made one and am totally obsessed! I second all the requests for the pattern for the middle wreath, I have already spend way too much time starring at my screen and trying to count points and straws in that little picture! Also, what color/brand of paint did you use for your gold?
LOVE! Can you tell this craft challenged wreath lover where one might find cocktail straws? Three little ones make it virtually impossible to “shop” around for such an item;). Thanks and you ROCK!!
You can get them at most grocery stores and Target!
OK, that’s it. I want to make one too! I’m off to the grocery store to get straws!
What is the finished size of the wreath? Thanks
The finished size is 19″
Are cocktail straws and coffee stirrers the same thing?
Thamks
I am seriously dying over the mind blowing awesomeness of this! I totally want to drop everything else that I’m SUPPOSED to be doing to make one right now. Love the video!
Totally obsessed with this! Made two today! But when I get to the last step to add the structure some of my straws curve instead of staying straight. I thought maybe it was because the first one I didn’t measure the straws and just free handed. But the second one I measured and they still did it. What am I doing wrong ??
Maybe you are pulling the wire too tight?
I made mine last night! turned out perfectly! It was so fun and your video was very helpful! I used fishing line because that’s what I had on hand, but (just FYI for your readers) it wasn’t sturdy enough to provide the structure required in your last step. Wire is a must for that last step. 🙂
https://scontent-b.xx.fbcdn.net/hphotos-ash3/537937_10100206093643743_1356568759_n.jpg
Mandi — will you provide a tutorial for your center wreath too? THANKS!
You — are a genius. I hope this goes viral, but some people might think it is too complicated. I am pinning it! Love your Guts, Mandi. Ann
Your geo wreath is gorgeous!!! I love ittttt!!!
This was a lot of work for you to put together a video and a tutorial; thank you! I am totally doing this with my kids. They will lose interest in the wreath aspect immediately, but man will they have fun making different shapes. Thanks Mandi! Merry Christmas!!
I love this so much! I can’t wait to try it (and end up making about one million of them!)
Thank you for not posting the tutorial on the middle wreath. Even though these are popular, linking to an Etsy shop gives the impression you are copying that shop’s product. I look forward to trying out this version. And I love that hanging light!
Cannot believe how simple this was to make, and so much fun! I would also like to know the name of the gold paint you used. Thanks for taking the time to make that video– it really helped.
I LOVE the blue on that drawer unit.. Did you paint that yourself? Which blue paint did you use? Thanks!!!
thank you for this tutorial!!
Ok, I’m so frustrated! I’ve been to walmart, a grocery store, and target, and I can’t find those stupid straws! Walmart had black ones, the grocery store had brown, and I didn’t find any at target. I want freaking white straws!!! Any ideas?! Maybe I’ll settle for black if I have to.
I am not sure where you are located but i bought mine at Harmon’s (if you happen to be in Utah!)
Nope, Texas! Maybe I’ll have to make some Utah family or friends send me some. Ha!
Wow! I can’t find these straws ANYWHERE! It’s making me crazy! And no one knows what I’m talking about when I ask! Three different grocery stores, 2 targets…no one knows what I’m even talking about! Any advice as to where these are specifically located by those who found them????
You can find them at Target by the paper plates. They come in a clear hard plastic container. I only saw black.
I’m looking for a dress like the blue one you have pictured. I’d love for it to be an old library card catalog (my dad was a librarian so I grew up spending all my summers helping him get organized) but I love this one too. Where do you suggest I start looking for something like that? I live in Northern Utah but I’ll take any help you can give me. Thanks!
You make the coolest sh*t. That is all.
Mandi, i made bunch of them, using your tutorial, in red, and decorated my whole Christmas three, Looks so good and not traditional. Thank you!
Mandi. Thank you for the tutorial, Made three of them in black. Making a red one tonight. Loved the whole thing and makes such a statement on the wall! You’re amazing and very creative! Thank you!
This is a great tutorial!! I have been wanting one of these for so long but it’s too expensive! I will definitely be trying this out! Thanks for sharing!
Brilliant! Straws come in so many colours you could make one to suit your decor. I have a package of straws in different neon colours. I would love to make this and hang it in front of a window.
Is it possible to paint the finished wreath? I love the design, but I’m not sure the color of the straws available are the best for my home. I was thinking a neon pink or emerald green or royal blue. I like the black, too, but I thought it might look a little less “plastic” if it was painted. What do you think?
I tried this and love the look of it but I was wondering if you had any tips for spray painting it? I tried to do a light color over my black straws and I could still see the black insides on the corners. Also, what did you use to hang them? Thanks for the tutorial!!! You are an inspiration to me!
On Monday 2/24 I have a blog post linking your wreath instructions and a picture of one I made without cutting down the straws. It is huge! Found that “coffee stirrers” do not work as well as the single tubed “Cocktail straws.” Or maybe it was not cutting them down? Too bendy/curvy. More wreath experimentation needed! These are wonderfully addicting, and would make great gifts to local friends (have you every tried to mail one?). I left my first one plain black, but spray painted this huge one red. Thank you for the great instructions!
Great tutorial, but I am particularly drawn to the plant you have beneath the wreath in your kitchen. Can you help me out with the species name?! Love your guts, Sammy Lee
Mandi,
How many straws come in a package? I am looking at doing this but with paper straws. I need to know how many to get. Thanks so much. I saw you on Studio 5.
Thank you so much for sharing this tutorial! I used 1/4″ copper coil from the hardware store (50′ for $30) and really, really love how it turned out.
https://sugarsugarhouse.com/2014/04/09/diy-himmeli-esque-wreath/
Thanks again!
Hi Mandi! I have 5 inch cocktail straws. Do you think cutting them down to 4.5 inches is totally necessary? Was going to make this for my new apartment this weekend, but I don’t have a rotary cutter and am mostly dreading cutting that many straws only a 1/2 inch!
Thanks SO much for this amazing tutorial!!
-Rachel
Where did you get the lovely gold hanging pendant lamp in your last photos?
Hi,
I am just wondering if it is necessary to use cocktail straws. Would any straw be fine?
Thanks,
April
thank you for this tutorial. I love it I made 2 one just like yous and. A 3D star
I must know where did you get library card holder in blue
I found it at the thrift store! It’s so good right!?
xo
m
You’re obsessed with himmeli too? Phew! I thought I was the only one having himmeli in every room of my house!
You’re obsessed too? Phew! I thought I was the only one.
Hi Mandi,
This is a great tutorial – thanks!
I just wondered if you could give me a rough idea of how long it took you to make?