Remember how I just took another week of? I get the blogger of the summer award. The good news? Summer is just about over, and then I will be back and handing the award off to someone else.
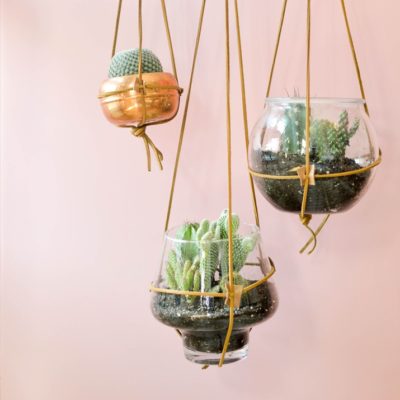
I have a really simple project to share with you today. So simple in fact that your kids could help you do this! It is a concrete and glass succulent planter, and it looks about 1000x more expensive than it really is.

The best part is how unique each planter is. Start with varying glass containers. My fave place to buy them is Homegoods, they always have lots of different options and most will be under $5.
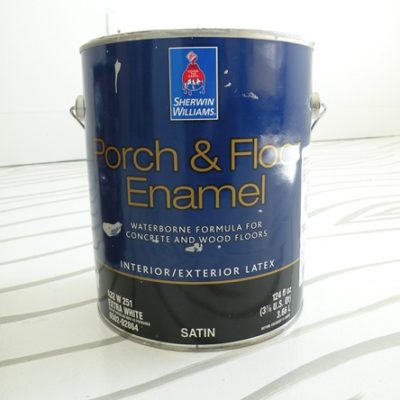
Mix a batch of Quickcrete together. I like using the kind that comes in a bucket. Its a much more manageable amount and you have something to mix it in!

Scoop concrete into your glass container.
With your planter on a towel, gently but firmly hit the bottom of the container against a flat surface. This will make your concrete settle.

Wipe off all of the excess concrete with a wet sponge.

If you are using a planter that you can fit your hand into you can make it so that the edges of your concrete are a little more jagged.

I love when things are imperfect. It makes me feel not so left out.
Scoop out the center so you have a place to plant your succulent


Let your planters cure for at least 36 hours before you plant them.


The fantastic thing about succulents is that they are really hard to kill. You know, for those of us that are serial plant murderers.


Those are cool! Love it! xo Kristin
Just killed a succulent this summer, officially no green in my house because I kill everything, even succulents.
Dumb question, but why the concrete? To keep it less tippy, absorb the water?
Serial Plant Murderers…lol, Love it! I'll have to try this in my office. It needs some life…until I kill it.
Super good question Jess! Mostly because it looks cool.
xo
m
gurrrrrl, I mean….these are awesome. just awesome.
I love this take on succulent-planting! It has an industrial feel to it, but a softness that comes with a plant. Genius mix of the two 🙂
Concrete should be great to keep moisture…like shards of pottery do in undrained pots…and concrete in basements 🙂
Perfect for WE who forget to water!
Did you add soil according to aesthetics, or plant needs?
What a fab idea Mandi! I'm in love.
Do you still have to layer it with rocks and moss or did you just do dirt? I know some people even do sand. I don't know the perfect order for all of that! Help! haha.
LOVE these! Will have to make and "plant" a fake plant. cuz..well…I kill everything. Even the family chia pet. and a cactus. and a succulent..and and…yeah…
Thanks for sharing another one of your amazing ideas. I love not only your creativity but that you are so generous with it. Cheers – CT
I love this!
P.s. cant wait to see what become of the twirly-swirly headboards !
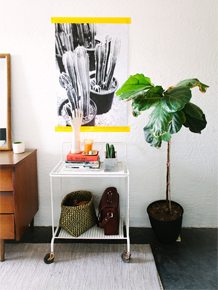
I LOVE the one with the wood below the cement!
-Becca
Ladyface Blog
It's actually very easy for me to kill succulents. I wish it wasn't!
That's a cool idea!!!
You have a great sense of humor. I bet you could make a cemetery tour hilarious.
This looks awesome Mandi! Gotta love a simple AND fabulous project! 🙂
-Mon
Such a great project…but I can't take my eyes off that table!!! details???
I want that picture on the wall! LOVE it to pieces!
I love that. So pretty. I love that the plant is growing through the concrete. I love controlled imperfection too, I think it makes things more interesting. How boring is the idea of perfection anyway?
https://www.etsy.com/shop/CurvyTiffy?ref=seller_info_count
sorry, but these are ugly…..simple dirt looks much better with succulents. 🙂
Just a suggestion from how I form concrete molds that need a center for flowers/soil or other objects, and this makes it actually much easier and leaves an irregular edge as you suggested. Find a cylinder object taller than the planter filling with concrete, such as a; vase, tube, tall cocktail glass, toilet paper or paper towel cardboard rolls, pringles can, shampoo bottle, etc.
Place your choice of cylinder object in the planter 1st, then pour the concrete around it, or, fill the planter with concrete 1st and then press the cylinder object directly down into the concrete, squishing the concrete from the bottom up the sides of the planter, creating a perfect hole while creating an uneven edge.
Thinking out of the box, why not separate the concrete into 2 or 3 uneven amounts and color each differently, depending on the color and/or choice of plant. Layer the colors, press the cylinder object into the colored layers, and in doing so, the combo of the colored concrete layers and squishing each colored layer upward will create a mesh of the colors and swirled art. Another idea would be to use a toothpick, skewer, pencil or knife, and run it along the inside of the planter wall and concrete, pushing downward. This leaves more of an uneven, freehand and swirly mesh of the colored layers. Which is pretty cool.
Believe it or not, brown or green moss would sustain itself on top of the concrete, adding more color.