When I was designing the Summer Reading Nook, I was envisioning something that was sort of vintage campy. You know big canvas tents, really basic shapes, the kind of thing that when you picture a summer hideaway it instantly pops into your mind.

This tent can be done 2 different ways. You can make it permanent or removable. Living in Southern Utah we get rain maybe twice a summer. Its very very dry here, so I wasn’t worried about the drop cloth being damaged in the weather. So my tent is permantly attached to the nook. If you want to make yours removable, you will just need to sew the drop cloths together. Super simple.
You will need:
(2) 9×12 Canvas Drop Cloths
(2) packages of curtain grommets
(4) Large Screw Eyes (pictured below)
20 Feet of Sisal Rope
We are going to start by attaching the screw eyes to the 4×4 posts.
Drill a pilot hole into your 4×4. The eyehooks are very thick, if you don’t do this you can risk splitting your entire post.

These are the screw eyes that you want. You can find them at Home Depot or Lowes and they are around $3.00 each I believe.

You should be able to screw them in by hand, but if it is getting really tight and they need to go in deeper, my favorite trick is to put a screwdriver through the hole and use both hands to turn it.
Now that you have your corner where the fabric needs to reach. Measure the distance from the pitch of your roof down the roof line to your screw eyes (write down that #). Then measure from the screw eyes to the ground. You are measuring for your canvas roof so make sure to add a couple of inches to your measurements, you don’t want it to be too short. Oh and I wanted mine to puddle, so I added 5 extra inches to the wall measurement. To make the roof/sides you will need 2 drop cloths that are 9×12. Each one will run you around $25, but Sherwin Williams has some on sale right now for $14.99.
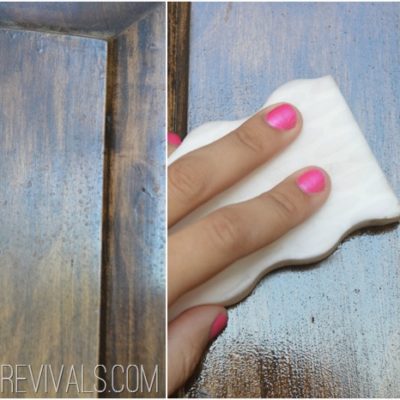
Of course the greatest way to get huge pieces of fabric for a fantastic price is to grab a drop cloth. These things are one of my favorite cheapy fabrics because they are durable, a neutral color and huge. Oh and cheap. (Did I already mention that?)
Lay your drop cloth on a flat surface. Mark your width and height and cut your fabric to that size.

Fold your drop cloth in 1/2 hot dog style (OMGosh remember that?!)and mark where the pitch of the roof ends (where your screw eyes are)
Now we are putting on the grommets. Attaching grommets is VERY easy. And when you are don’t you are going to have something that reminds your kids of shipwrecked Ariel…at least that is what my girls thought. I found my grommets at JoAnn’s. They are regularly $10 but use a 40% off coupon. You will need 2 packages.

With your drop cloth still folded in 1/2 figure out the width between each grommet. Divide that # in 1/2 and draw the first mark on the side with the fold. The distance between each of my grommets is 15” so my first mark is 7.5” from the fold. (Doing it this way saves time) then mark the full spacing (15”) between each grommet across the rest of your drop cloth. Line each mark up to the center of your template and trace.


Cut through both layers of fabric when you are cutting out the template.

Place the backside of your grommet on and then snap the front on.

So easy right?!! If you are making your tent removable this is the point that you will want to sew it together. Also you will want to hem the raw edge with a sewing machine or with hemming tape.
Tie a large knot in your sisal rope and string it through your screw eyes and all of the grommets. To tie the second knot is definitely a 2 person job (one to tie and one to hold the rope taught.)


We attached our fabric to the crossbar with a stapler along the top.

Hope this inspires you to make something fun for the little (or big!) kids in your life!


Any ideas for when it rains and snows? I live in SLC. 🙂
I just love this little reading nook! We built the structure for our daughter this past weekend and she’s already having so much fun with it. I’m working on the tarp portion and was wondering how you secured yours when it’s rolled up? And did you weights he bottom at all? Thank you!!
My husband and I made this playhouse and a similar roof a couple of months ago. We are not handy or crafty at all but were able to figure it out. Our daughter loves it! Our only issue was that the drop cloths became covered in mildew quickly! It doesn’t wash out so we will have to replace the roof.
What the heck is 1/2 hotdog style?