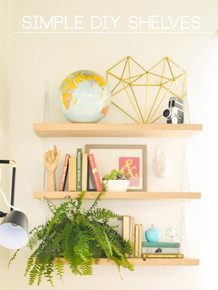
Do you love built-ins? Me too. Do you have a spot for them in your house? Me neither. So what’s a girl to do? Hmmmm…. I think you know where this is going. Today I am going to teach you how to build industrial modern floating shelves. They are AMAZING and SO easy. I mean easy breezy.


Start by deciding how you want your shelves to look. I knew I wanted mine to go floor to ceiling and I knew I wanted them evenly spaced. So it was just a matter of deciding how many. Did you know that odd numbers in design are WAY more pleasing to your eye? Its true friends.
To visualize and space out the shelves I put painters tape up on the wall, please note that I put tape where I was planning on trimming out the windows. Thank you for noting that.

The goal for this project was to capture a really industrial vibe and then when you step in be a little caught off guard by the simple modern touch. Our secret weapon is Plexiglass. To figure out the amount of board you need measure the width of the ideal design of your shelf. Mine are 51” long and 10” deep. So for each shelf I needed 114” of wood (2 @ 51 “ and 2 @ 6”)
You will also need (5) 6” 2×1’s to use a braces to support your Plexiglass.

When it comes to your Plexiglass take a breath and get ready to jump for joy at this next sentence. Did you know that Lowes can custom cut it for you? I.KNOW. I thought that I was going to have to dig deep and find some unknown Plexi ninja moves. Whew, on that one. Just tell them the size that you need and they will make it happen!
As far as the hardware goes you are going to need a box of 2.5” deck screws as well as some giant hex bolts and washers to spice the design up a little. These are around $1.25 each. I used 20 on my shelves.
I wanted the wood to be fairly rustic I bought Cedar 2×4’s from Lowes. The prices were great (less than $5.00 for a 10 ft board) they have a really rough cut on them which was what drew me in in the first place…(you know when the hubs raises his eyebrows and says “there is going to be more work if you get these ones because you are going to have to sand them…” and then I just smile and say “nope, I like their roughness just fine.” and then he rolls his eyes and says “whatever.” Yea, you can expect that to happen.
Start by cutting your wood down to the correct length.

Give your boards a light sanding to remove any painful swear word inducing splinters. And for goodness sake make sure you are wearing safety gear friends. Just like we don’t want old people smell in our lungs we don’t want new wood smell in there either.

Line up the framework and start assembling. We drilled (2) 2.5” screws into the backs of each piece and then used the Hex Bolts to secure the front.


To make sure that the Plexiglass was completely flush with the top of the shelf we flipped it upside down with the Plexi on a flat level surface and attached our brace pieces with a nail gun.


If you thought that was fun, just wait for the next part…INSTALLATION!
Start with your bottom piece. Make sure that it is COMPLETELY level. Find your studs and drill 3” deck screws into them. Don’t worry about your shelf being centered on the stud, just put your screws where they need to go. Also remember the rule here at Vintage Revivals…don’t judge my messy house. Thank you in advance.

Just keep happily moving up the wall until all of your shelves are secured.

I wasn’t 100% convinced that I wanted to stain them before installation (because I am currently mildly obsessed with natural wood tones.) BUT once they were up I wanted a light stain. So I did something that I had never done before.
I used Restore A Finish on them instead of regular stain. Yes that is a cake pan…I couldn’t find a paint tray. Remember the whole not judging thing? Good.

I LOVE how the Restore-A-Finish turned out. Over time it has lightened to this super beautiful light walnut that I want to marry (if that was legal and stuff.)

And here it is all staged:

Clearly this was before the desk. And guess what?! I have a fun time lapse video on the staging so you can see the EXACT process, so watch for that over the next couple of days!!


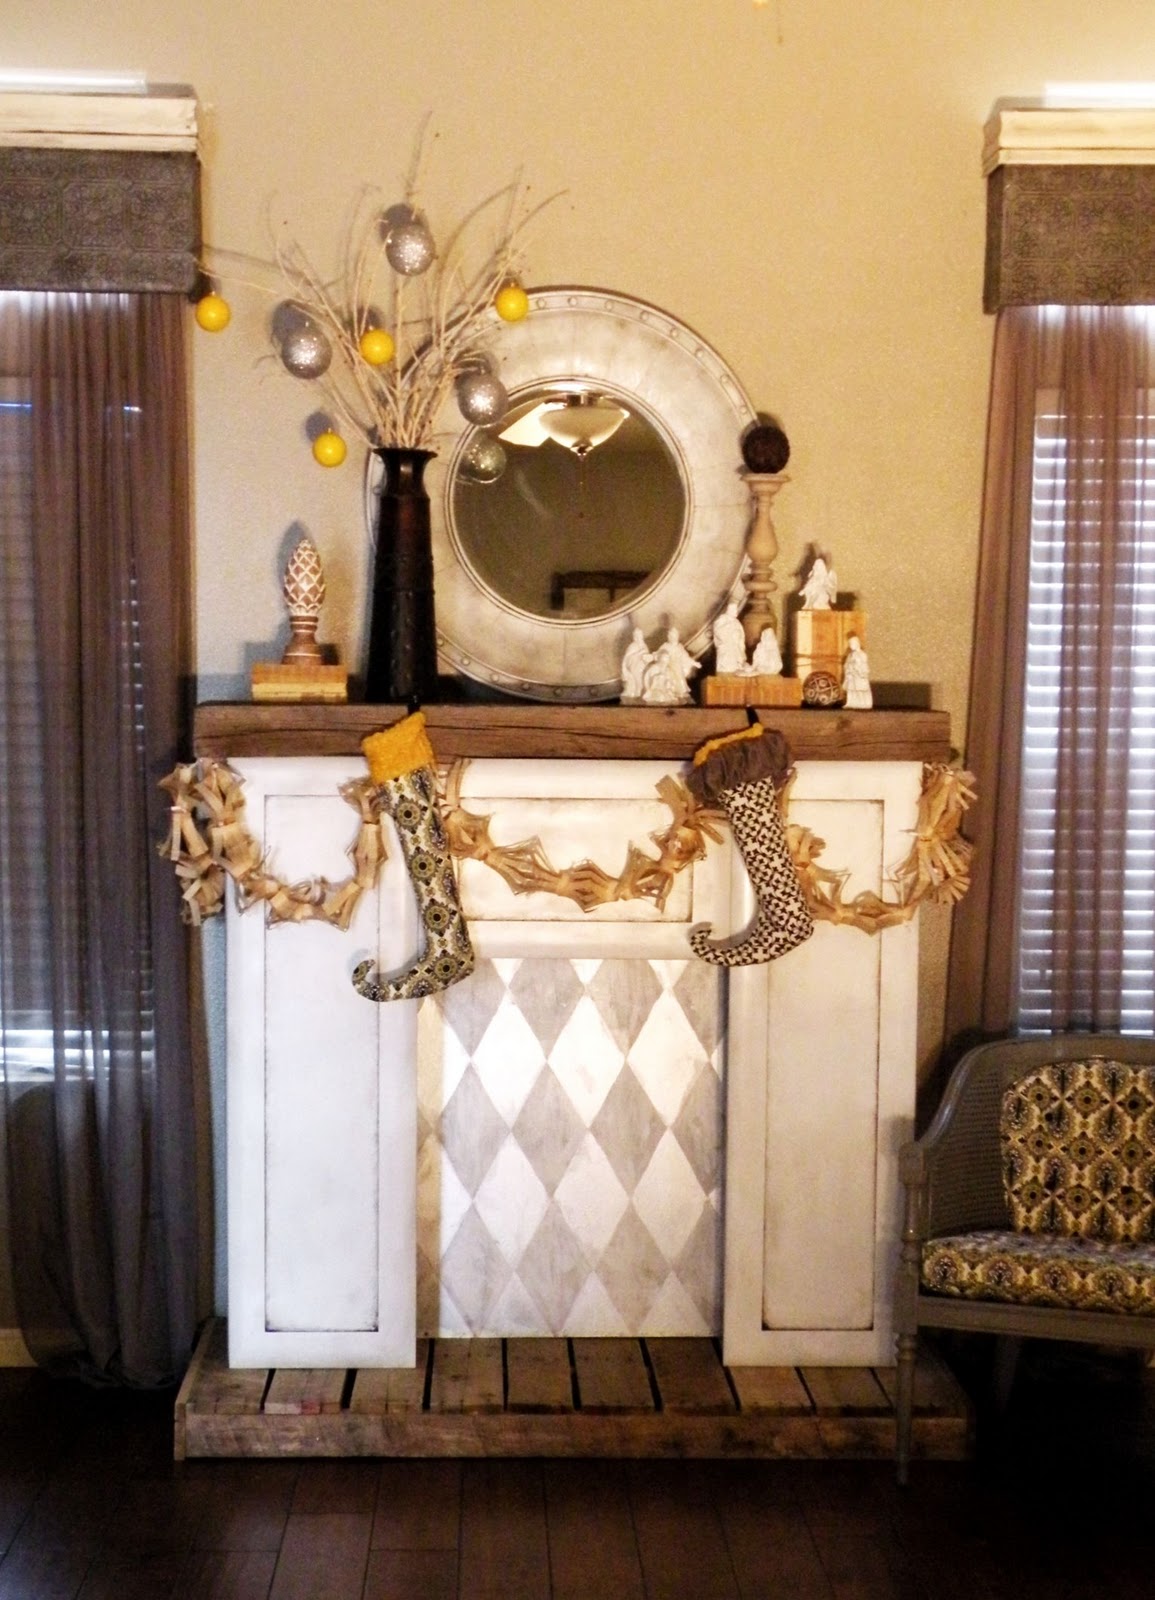
Its been so fun to transform my living room, check out what it looked like 2 years ago when I build my Faux Fireplace…
Love Your Guts, Mandi
HUGE thank you to Lowes for teaming up with me on this fun project!!

Love it! Great tip on odd numbers being more visually pleasing. 🙂
GORGEOUS! You have no idea how in love I am with these shelves! I wonder if I can get my husband to figure out how to take this idea and make me a desk like it?
Sarah
Sarah a desk is TOTALLY doable!!! Send me pictures if you guys do it!!
xo
m
Wow, they’re gorgeous! Love your styling too 🙂
Thanks Caitlin!
oh- i want some of these!!!!!!! really i do. and i want to repaint my entire kitchen, living room, hall a bright crisp white. 🙂
Dude. I am telling you, white is the way to go. I LOVE it!!
love your guts
m
This is my favorite tutorial you have ever done, thanks!
oh my word Andrea! Thank you so much for letting me know!!
xo
m
I love them. I wanted something similar in my great room for all my books, but used brackets instead of floating shelves- I’m a little afraid of power saws. Yours look really beautiful.
Em I am sure they look amazing! Do you have a pic?
love your guts
m
They look beautiful and you are a staging genius. Nicely done. The messy house shots might be my favorite.
Christy!! I am so glad to hear you say that!! Seriously that is how it looks 99.9999999999% of the time….
love your guts
m
I love these! I’d really like to do something similar in our dining area, but we’ll be selling soon so maybe I should wait ’til we’re in the new house. I probably wouldn’t want to leave them behind!
They look great! I love the style you’re going for in that room. A little southwest a little modern… Fabulous!
You are amazing!
This looks fantastic!
I MUST steal this idea…
you.are.my.hero.
Love the plexiglass touch, Mandi. Super fun!
Now those I LOVE! Your room is looking awesome! Can I just tell you how amazing your photography is? Very impressive.
I am IN love with these. I have plans for my living room, crisp white walls, with the wood wall like you did in your hallway, (still excited to see the tute for that!) and these will replace our big black bulky ikea shelving unit wonderfully! I love you AND your style! It is so much like mine and makes me discover new ideas for my own home!
p.s. just so you know that you are totally inspiring…here is a little story on your style motivation and to do what you love no matter what people think… i used your quote about owning your own style and linked back to your post that day months back.
https://ashleewray.blogspot.com/2012/01/sign-stays.html
you can view the original post in the link on the above post
I love it! The plexiglass is a great spin.
I have been following you for a pretty long time. It’s so fun to see how your taste has changed. I love everything.
You are amazing!
I know it’s a little early in our relationship (a.k.a. me stalking your blog) but I’m in love with your brain! These shelves are so beautiful and perfect. And everything is arranged in such a wonderfully smart way! Thank you so much for sharing all this!
Gabrielle @ Oh Boy, Cato!
thenewcatos.blogspot.com
Hahahaha Gabrielle you are hilarious!!
xo
m
This comment has been removed by the author.
Looooooove these! What a great idea!
Love them. Can you expand a little on using the Restore-a-Finish? Is it different than stain or just a different type of stain? Love the color, does it have a name?
Love your shelves! Love your shelves! Love your shelves! AND the way you have staged them. Oh my, how am I gonna find a place to do those. CUTENESS!!
Very cute! I love it!
Wow! I didn’t even recognize your living room! I love the way you did those shelves. I thought I was going to have to buy special floating shelves from Ikea or something, but I love the plexi glass. As always, you blew my mind with your awesomeness!
I am in love with those shelves. I have been going back and forth on installing floating shelves in our living room and you have completely inspired me to go for it!! Love. Love. Love it.
Love them! Do you know how much you spent total on them??
I love the shelves Mandi! They look awesome! I love the tip about getting plexi glass cut at Lowes. I have a project coming up that I’ll need plexi glass for and I was thinking I was going to have to find some obscure plexi glass company to get me the right size. So awesome that I can just get it at Lowes!
I love this! I love lots of things you do, but I think this is FINALLY the first project that I just HAVE to do! I’m only worried about where to find “staging” ninja skills. Your staged shelves are just gorgeous.
I’m obsessed with these! Love. Love. Love.
I likey a lot.
Those shelves are fabulous! I love them…especially the plexi-glass on the top. Super Duper!
Hi, Mandi
You Rock! I always love what you are up too!
Vanessa
This is so cool! I will have to try this project once Christmas is over! 🙂
https://apinksunset.com
I always liked the look of floating shelves and you make these look so easy breezy to build. thanks for sharing this easy idea.
wow gorgeous..
Pretty much pure awesomeness. GREAT tip on putting the plexi (and shelf) upside down to attach the braces. I seriously said to my monitor, “NO SHE DIDN’T. Yes. Yes, she did.”
Seriously lady, these are fan.tas.tic!!! I’m pretty obsessed with the plexi glass look – you are brilliant – and I miss you!!!
These are my favorite project of your by far….ok….one of my favorites! I just don’t think I could style them as nicely as you did, they look fantastic!
1. Those shelves are killer. Love the hex bolts.
2. Your styling is soooo you. By which, I mean adorable, spunky and totally unexpected.
3. I would never judge you, but I enjoy your recurring reminders just the same.
Thank you for being awesome!
Love the shelves — question about the plexi: Did you secure it to the wood at all? I’m wondering if, unsecured, it might work like a see-saw if you put something really heavy on one end, with nothing on the other end?
Hey Valerie!
That is a great question! If you scroll up to the pics of the installation you can see that there are brace pieces right against the end of the shelf! So, they are not secured but dont see-saw either! Hope this helps!
xoxo
m
So, how thick is the plexi? It must be hefty to prevent buckling between the braces, which must have a hefty price as well?
You take all of my ideas before I think of them 😛 haha kidding, but I seriously love your blog! Devoted reader and admirer for about 1.5 years. Can’t wait to …start… my own projects. I’ll get there someday.
Oh…my….well, I have NO words!!! This is my FAVORITE stinking DIY in ages!!!! What?! Gorgeous. Stunned. Wow.
Catching up on my blog reading…and oh my goodness, love the shelves. We have a fireplace on the middle of a wall, with a window on one side, and a wall on the other. These would be awesome on the wall. Just forwarded this post to the husband.
I love the look of the shelves so much, and it is one of my favorite tutorials you have done. I think it would only be surpassed by the wood block and orange ombre chevron wall tutorial (once you have time to post one, hopefully)! If you’ll indulge me I have a couple questions, though:
Does it matter where you put the deck screws into the shelving? As in, did you put them through the back plank with one to the far left, one to the far right, and one in the middle? And if it doesn’t matter where you put the screws into the studs… What prevents you from splintering the stud a little on the side of it so that over time the deck screw may not be as secure and eventually fall?
I know it seems like a lot of useless questions for other people, but in college I had one of my favorite photos framed very nicely in a medium weight frame and over time it fell, shattering the glass and frame. I am overly cautious before starting a wall project like this for fear of a repeated accident.
First of all, I love this idea. I’m trying to figure out if I can manage diy floating shelves and this is a great plan. I’m not super handy beyond putting together ikea furniture, though. I have a question, maybe a dumb one. I’m not clear how you installed onto the wall exactly, did you just go underneath the shelves with a drill and deck screws? I’m thinking of removing the front of the shelve for easier access and also staining before mounting. What do you think? Thanks again for this!
Dude! I’m brainstorming ideas for my living room (re-re) redesign and this would be an awesome method for building an industrial-ish coffee table. I love the plexiglass idea so my 3 crazy boys dont break it and stuff! BAH!
I am in love with these shelves! I can’t wait to use this tutorial in my house. I linked up to this post on my blog here https://norasbows.blogspot.com/2013/05/decorate-kids-room-series.html. Thanks for this!
Hi! Love this!!! Have been thinking of doing something similar – I’m not clear how you attached them to the walls though. Can you elaborate? Thanks!!!
Thank you for your wonderful tutorial on the floating shelves and fireplace mantel! Just what i’ve been looking for. Did you put in your hardwood floors? Would you mind sharing the brand and name of the floor? Everything ties in so well together!
WOW that was a great post. You made building the shelves look so easy. Thanks!
These are Awesome shelves! Love the rustic modern industrial look they have :)… One question: Dod you make the long shelf behind the couch the same way?
Your shelves look great and easy to make. I’ve always wanted to make some but some of the tutorials seem complicated. Love these. Thanks!
Oh, I am def adding you to my blog list! I am having an affair with natural wood myself! I have been scouring the Earth looking for rustic/reclaimed wood floating shelves! There were some on GroopDealz one day and I SHOULD have snagged them, but I didn’t 🙁
Well I found you, so now I can do this myself. I LOVE the way you added the hex screw/bolt things! THat looks so awesome. I just can’t figure out how you mounted them to the wall. You say to just screw into the stud wherever. Do you fit your screwdriver up under the plexiglass and screw it in that way? I know if you buy floating shelves they have you attach them from the back of the shelf into the wall which is strange! Your way seems more stable, I just need a tiny bit more clarification.
We just built our own shelves in the garage and I made a coat rack and we had Lowes cut the wood for us, too! It was so easy! Can you imagine if they didn’t do this? We’d all have to buy ginormo saws and have to figure em out!
So Lowe’s sells the plexi glass, too? I think I might just add wood to the top, but your plexi glass looks awesome! I still would like to see some ninja moves!
Love your stuff!
Great idea for a combination of modern and western style floating shelves. It really makes your wall adorable.
Wow. Great solid shelves. And nothing is wasted. These shelves are perfect for this room.
I love these!
What kind of wood did you use?
These are so fun, but I don’t see how you screw them into the studs once they are already put together? Would they be sturdy enough to hold a shelf worth of books?
I wanted to send you the link to my blog because we built your shelves for my baby’s nursery. I believe my husband contacted you a while back to tell you we were going to try them. Here they are in all their glory! We changed the depth and the stain color to fit our needs but we absolutely LOVE them! Thank you so much for posting this DIY! <3
https://www.thetaylordiary.com/2014/08/a-labor-of-love-millies-nursery.html
Hi, thought that you might appreciate our own DIY floating shelf kits at http://www.etsy.com/shop/silicatestudio
Thanks!
Love these shelves and love your style as well!! My dad and I are recreating our own and just have one question. How thick is the plexiglass you used??
LOVE THESE. These are exactly what I have been looking for. Do you have an etsy shop? Can I just PAY you to make me some? I’m serious.
Hi Mandi,
I found your blog via Mom In Music City. Your shelves are beautiful! We have a blank space next to a ledgestone fireplace wall we installed a few years ago, and I’ve been baffled as to what should go there. Shelves like these will be the perfect complement. Thank you for a great tutorial!
Val
did you purchase the flexiglass at Lowes? I’ve never seen it sold there. Also how thick is the plexi?
Mandy,
My best friend sent me your page when I was looking at building a shelf. I fell in love and used your inspiration to build one of my own to sit my projector above my couch. I cut a notch in the back for the wires to run down. I LOVE it. Here’s some pics:
https://www.dropbox.com/sh/89xwar6dg5eguaw/AACmh1MdQDSTI-ZaphqqRIQLa?dl=0
Thanks in KC,
Shane
How did you make it so you couldn’t see the nails when you put on the braces and what size nail did you use? Is it possible to not use a glue gun? My husband and I just bought our first house and are new to this whole dyi thing! ?
Thank you for being the only website to actually put a step by step instruction for this project. I looked at web page after web page for one. Beautiful job too!!
bravoooooooo
fantastic work