What do you do when you need to replace carpet and feel like doing that is just not…creative enough? Well my lovelies, if you are anything like me you paint the concrete subfloor!!


I am going to teach you in 7 easy steps how to prep, paint, and finish concrete floors. And I would like to give a HUGE thank you to Sherwin-Williams for teaming up with me on this post!!
![]()
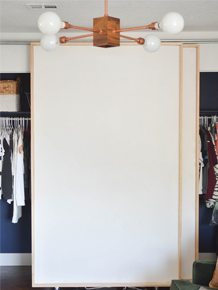
This is the picture that I showed you a few weeks ago of Ivie’s room:

Not so awesome. But I have big plans in store and it all starts with my personal White Box Challenge ala Design Star.
I DID NOT want carpet in Ivie’s room and our hardwood is discontinued (and expensive) so I said to myself “Self. Lets paint the crap out of that floor.” And that is just what happened. You can do the majority of project in a day for less than $150.00.
Painting concrete can be a little daunting. Especially because most of us have never painted a floor before. I was concerned about durability and finish. When I went into my local Sherwin-Williams, Sam the Manager was SO nice and patient and answered every single one of my questions. Twice. Because I am thorough like that.
When you are painting concrete the first thing that needs to be addressed is the carpet glue.
STEP 1: Remove Carpet Glue

Carpet glue is LEGIT. It is one of the strongest adhesives and can be really hard to remove. The best product to use is Lacquer Thinner. BUT it is extremely flammable. You will want to use a plastic brush and plastic scraper to get the majority of the glue off. Douse the glue with Lacquer Thinner and let it sit until it evaporates, this will soften the glue. Then douse it again. Use your plastic brush to loosen the glue and then scrape it off with your plastic scraper. Once the majority is gone and the lacquer thinner is dry go back over it with a floor scraper to remove any residue left over.
STEP 2: Remove Thick Areas Of Paint

Sorry for the awesome picture…you know when its 10:00 and your husband is scraping in a fury just so you will leave him alone and he is not wanting to be a blog model? Ya. Me too.
When the builder built our house they sprayed the walls and baseboard so there was a high concentration of paint right at the base of the walls. THEN when we moved in we sprayed the baseboard too. So there was at least 4 layers of paint and it was thick. We used a floor scraper to remove the thickest areas. YOU DO NOT NEED TO REMOVE ALL OF THE PAINT! We scraped off a good chunk of it and the rest we sanded so it blended into the floor and didn’t leave a lip (but we will get into that in a minute)
STEP 3: Repair Concrete
This step sounds WAY more daunting than it really is. If you have previously had carpet you will need to patch the holes that the tack strips left behind.
Simply mix some Quickcrete and fill the hole:

Use a metal scraper or putty knife to smooth it out as much as you can.
Then very gently using a damp rag rub the concrete smooth.


Let it cure per box instructions.
STEP 4: Sanding and Clean UP
This is a really easy step too. If you are painting an extremely large area you might want to rent a sander but for a room that is the size of Ivie’s (approx. 12×12) you wont need to.
All you need is a pole sander. A pole sander is a base that holds the sandpaper and attaches to a painting pole. Use 60 grit paper and go over your floor in this pattern. Sand in one direction, then sand in the opposite direction and then go over it again in the first direction. So you will be sanding the entire floor 3 times. Concentrate on areas with a lot of paint and where you just repaired the concrete.

Unless your floors are greasy you will not need to scrub them down (if they are or have grease spots use TSP). Alternate sweeping and vacuuming 4 different times. It may seem a bit like over kill but it is the BEST way to get all the dust off. If you get your floors wet after this point you will need to wait a minimum of 24 hours to let them dry before you paint!
Step 5: Painting
You never want to use a regular latex based wall paint on a floor. The durability will always come up lacking. To paint a concrete floor you need special floor paint or all your hard work will be in vain. There are a few different options when it comes to floor paint at Sherwin-Williams. They have a line called H&C that is made specifically for concrete. The concrete will basically absorb the paint . You can have it tinted to a variety of colors.

There is also Sherwin-Williams Porch and Floor Enamel that like paint, sits on top of the concrete. It comes in a satin finish. (This is what I used)
You will not need a primer when using the Floor and Deck Enamel because its self priming!! (YEAH!)

The colors I used on Ivie’s floor are Extra White (the whitest base they have) and Gray Clouds.
Ok, now this is where the tutorial may get a little hairy. See, after I painted it the first time I changed my mind and repainted it the opposite way… (and yes I did a trial run but changed my mind after seeing the entire room finished…such is the life of a DIYer.)

So the tutorial for how to paint the faux bois is color backwards. Don’t judge.
Painting the basecoat on the floor is literally the easiest fastest thing I have ever in my life painted. It took me under 10 minutes to do the entire room!
Start in the back corner opposite of the door (you don’t want to paint yourself into a corner!)

You don’t need a paint tray, just dump a small amount of paint onto the floor. You also need to use a roller with a 3/8 nap or shorter because you want the floor to have a smooth finish with as little texture as possible.
Then just start rolling!!

Depending on the color you may need to do a second coat. When I painted the floor gray I did not need one but when I painted the white over the gray I did.
The Floor and Deck paint is latex based so its not super fumy and let me tell you it is MUCH easier rolling a floor than rolling a ceiling.
Once your coat has dried for 4 hours you can start painting your faux bois (fake wood grain). And though this may look impossibly hard you pretty much cant screw it up.
Use a 1’” brush and paint a long slightly squiggly line.


Space our your next line and follow the same squiggle pattern. If you space your lines close together you will have a busier pattern. Where you have deep bends is a great place to add a knot.


Now I know what you are thinking. This is going to take forever! But I did both color options in one day (that included drying time) Because there is not really a rhyme or reason for this pattern it goes really fast.
Let this cure for a minimum of 4 hours before putting your top coat on.
STEP 7: Topcoat
This is what my floor looked like with and without a top coat:

I liked it before but with a clear topcoat on it it makes an enormous difference don’t you think? And it is so much easier to clean!!
Apply the topcoat the same way that you painted the floor. I did 2 coats of H&C Wet Look Concrete Sealer.

The only way to describe the difference is that it looks professional with the wet look gloss on top. Its SUPER high gloss and really sassy.
Now this is the hard part.
You have to let it cure for 72 hours before you can put anything on it.
This will cure it to the point that you a put things on it without damaging it BUT a full cure for Latex based paint is 30 days. It may feel a teeny bit tacky until that time has passed. This is totally normal, I would recommend using furniture pads underneath everything at least until the 30 day cure has been achieved.


There are so many decorative options when it comes to doing something like this! You could stencil, stripe, chevron, grid, polka dot the floors in your house and make it truly your own space! Just make sure that when you do you are using THE BEST product on the market. Porch and Floor Enamel and H&C Sealant from Sherwin-Williams. And if you have never ventured into a Sherwin-Williams store DO IT! The staff at the store in St. George are so knowledgeable and nice. They call me by name and check up on my projects. Sometimes when you are venturing into something unknown (like I was when I was painting this floor) all you need is reassurance that it will be as epic in real life as it is in your mind, so I would like to publicly thank the staff at my local SW for being rock stars!
Knowing what colors you are going to use is half the battle. I am OBSESSED with Chip It! Want to see some of the colors I am using? With fabric this bold how can I not have a white floor? (I cant wait to tell you all about the fabric next week!)

So what do you guys think? Do you love it?!
Love Your Guts, Mandi


I love how shinny the floor looks. I have always been a fan of white painted floors. Especially if you are going to put the bold colors (like your fabric) in the room! Chip it is pretty awesome. 🙂
Great information – thanks!
Oh wow! You knocked it out of the ballpark yet again, my friend. So unique and fun!
Looks awesome! I wanted to paint our concrete floors but our home is really old and the floors were super cracked and uneven. The concrete paint did not look so hot, and we would have had to pay to put a smooth layer on top. I still wish we could have tried it!
There is a product that you can do yourself for floors such as yours. It is a self-leveling mix that you just pour on the floor and it levels it’self out and fills in all the bad spots.
Awesome…the hubs and I had been fighting about what flooring we wanted in the soon to be newly finished basement, finally we agreed we should just paint the concrete! Great tutorial just in time 🙂
What a cool look! And yeah, I like your final choice better–will look awesome with that color scheme 🙂
You are one brave woman to free hand that! If I attempted that I am sure it would look like a toddler was set loose with a paint brush. It looks fantastic! Can’t wait to see what you’re going to do with the fabric.
Wow….I only wish I could have thought about doing something like this 2 years ago when we put new carpet down in our 2 grade level bedrooms. A painted concrete floor would have been much less expensive than carpet. I love how it turned out. 🙂
couldn’t have been more perfect timing! I saw on a yard design show them paint a brick porch and I thought that would be an excellent idea for our sad looking porch. But our porch is concrete and didn’t know if or how it would work. Looks like it is doable and turns out fabulous!! Chalk up another item on my to do list!
Very cool! I’m so excited to see what else you do with the space!!
You are ridiculous! I love it. I don’t have your design courage or your patience but you are amazing!
And by ridiculous, I mean ridiculously talented, amazing, brilliant, etc… : )
So totally loving this! Would not have thought to do wood grain but then again, that’s why I love your projects so much! Can’t wait to see the finished room.
Jen
I am in awe! I love it! Unfortunately, we don’t have concrete under our floors… but one day when I get to build my own house, I will make sure that’s what we do (for this purpose alone. 😉 Great job! Looks amazing!
Awesome!!! I’ve been wanting to do something with the basement floors but haven’t wanted to spend the money on carpeting the whole thing. Thanks for the ideas.
I am so jealous of this floor because it’s AWESOME! It might just be the answer to my ugly floor in the basement…hmmm.
The floor looks fantastic! Great job, and the tutorial is pretty awesome too.
Nikki Kelly @ the ambitious procrastinator
My aunt has painted and stained concrete throughout her entire home. It’s amazing stuff. My husband and I want to do that for our next home.
Yours turned out great!
Absolutely beautiful enough said!
Ah-mazing! It looks like a ton of work but totally worth it!
This is so crazy amazing.
Thanks a lot for this. My sons bedroom is a concrete floor and I have never know how to approach painting it.
I LOVE IT! I pulled up the corner of the linoleum in our kitchen awhile ago, hoping that there was old wood floor under it (like there is in the rest of the house), but it was concrete instead. I was so disappointed- I had planned on painting it if it was wood. It never even crossed my mind that I could paint the concrete! AWESOME! I think I’m gonna rip it all out tonight now.
Yay for painted concrete! I just finished mine… for the second time. I don’t know what went wrong the first time but it chipped terribly! So we sanded it all down and redid it. This time we put on 5 coats of sealant… hope that does the trick! Thanks for the tips, I know it will come in handy again!
Yep! I love it!
Beautiful, Mandi! I’ve painted a concrete floor to look like brick before but I love this look! Painting the concrete opens up so many budget friendly options! Can’t wait to see what else you have planned for this room.
my plan is to pull the carpet up today. havn’t yet pretty scared. Not any more. time to get busy. thanks
That’s a super fun floor! Are those products safe to use indoors?
Mandi! Seriously!!! You’re always thinking outside the box, love it. I always think about painting our outside concrete, but hadn’t thought about inside. You’re awesome and great colors too:)
Oh. My. Word!!! I just love you. I love how you aren’t afraid to shake things up. And guess what? When you aren’t afraid, what you do is FABULOUS!!! This is incredible!
When my daughter was little we painted her floor. We did it pink then painted big flowers on it. It was so cute! Yours look great.
Great tutorial. Beautiful floor!
Love the floor and love the fabric!!
Oh my gosh! So funny! I just finished painting the first coat of paint on a floor TODAY. I seriously just finished! We’re on the same page girl!
That is the coolest floor I’ve ever seen! Ivie is so lucky! In the past I’ve been afraid to hand draw a faux bois pattern but you make it look so easy I might just try it!
AMAZING!!! I just love your blog…you are so creative!
Sally
very amazing! can’t wait to see the whole room!
fa-reeeking a!! i am in love!!! this would totally solve my problemo in my basement. the kind of problem where the people who built my house were kind of deficient in the intelligence area and water gets in the basement all too often? please tell me you know what i am talking about. this would make it so just the floor, the awesomely painted floor would get wet and not carpet, pad, and tack strips that are pretty much mold dust at this point.
you are my hero!
freak Mandi! I love you and your style and your floors. We need to hang out again. Soon.
It’s FAB!
That came out pretty amazing!! I love it!
I love you a little more each day, Mandi!
Just…WOW.
amazing. love the white with gray.
I wish I HAD concrete floors so I could do this!
Your floor looks amazing and I love how simple the fake wood grain is. My husband and I live in a basement suite that used to be a garage. We have painted cement floors. However I have to say I don’t love them. Of course it might help if they were as nice looking as yours (ours are bright yellow..?), and I also don’t think there is a top coat on ours. A couple things about cement floors:
1) They get real cold.
2) They collect dust like crrrrrazy (I could sweep 5 times a day and they still wouldn’t be dust-free… again, this *could* be due to a lack of top coat. Our floors are very matte and almost porous).
3) If you paint cement floor, take extreme care to avoid debris and dust falling on the wet paint! Gravity + floor = impossible to get no dust particles in the paint, especially if its having to sit for days to properly dry. But those particles can be felt really easily because cement is so smooth. Also, particles that have solidified in paint really catch dust (see #2)!
4) An obvious one, but dang… cement floors is HARD. You want to make sure you don’t have many tripping hazards around the room or someone can get hurt (hello emergency trip to the dentist). And with cement floors, if you drop a dish, you lose that moment of “did it break did it break?!” crossing your fingers because there’s a chance the dish survived. It won’t. I just got married and I’ll be darned if my brand new set of tumblers and plates haven’t lost a few brave soldiers in just 4 months….
5) Because of #1 (cement floors are cold) and #2 (cement floor collect dust), you will most likely desire to put a large floor rug in the room. Be warned that most rugs DO NOT stay put on cement floors. I tried everything short of gluing our rug to the floor. It was sliding all over the place, and a huge tripping hazard (see #4 again). Eventually, I just used a crap-load of duct tape all over the bottom of the rug (don’t worry, it was a cheap rug). If/when we get rid of the rug, it will require scrubbing lots of goo off the cement, but for now it’s better than nearly dying every time I cross the room.
I wish the best to all you adventurous cement floor painters! I just thought I’d share my warnings for those thinking of this option!
Concrete that isn’t sealed will continue to ‘make’ it’s own dust! All of your sweeping and such will continue and will only get better when you put a clear coat on top.
Now I know what to do for the floor in our studio office! I love this! My husband and I couldn’t decide what funky/cool/majorly awesome thing to do so we just painted it white/grey. Look out, concrete floor…if I can get him on board.
I have painted concrete floors and love them … yes, they can be a bit chilly in the winter but I’ve learned that slippers or socks are my friend. One the flip side, in the summer they are also cooler and that’s a bonus. My question is, is that sealant slippery underfoot? I’m going to be in the States next month and will pick some up if it isn’t … too slippery I mean. If you could just run some kids around in socks and let me know if they have teeth at the end of it I’d appreciate it. Maybe you should use the neighbours kids just in case it is. Thanks!!
Nice work girlfriend. I knew you would pull it off!
I LOVE it!! I’m currently planning a boho woodland room for my youngest 2 kids, and the carpet in their room is nastay! This would be GREAT in there! I hope you won’t mind me totally copying the crap out of this. 😉
P.S. – Come help me! 🙂
Love the floors! What tool did you use to remove the carpet nail strips. We have considered doing the same thing, but really don’t want chunky bits of loose concrete.
Thank you in advance!
Teresa
Much like all of your crazy projects, this is simply glorious!!
This is AWESOME! I was just thinking a couple of days ago that I want to rip out our basement carpet and paint the concrete and this may be the push I need. AWESOME!!!
You are A.MAZ.ING!
i love this!!!!!! really!!
This is pretty flipping amazing – wow! I envy your sense of adventure – I wouldn’t have the guts.
I featured you today in my Friday I’m In Love favorites!!
https://socialsalutations.blogspot.com/2012/06/friday-im-in-love-wow.html
XOXO
Jenn @ Social Salutations
This looks A.MAZE.ING!!!!
She’s a lucky little girl! Beautiful floor.
Janet
That is truly awesome. It looks fantastic. Thank you for the tutorial — and the inspiration!
Tots FAB! LOVE IT! I’m dying to rip up the carpet and paint our floors…
Holy crap, YES I love it!!! Super awesome!!!!
After Hurricane Irene last year we lost all of our carpeting in our basement family room so we decided to paint the floor. A couple of weeks ago I saw a faux bois carpet and wondered if I could recreate the look on the concrete but decided it was too large of a room so I decided on another pattern. This looks awesome! Great minds…
Figure you already checked this out but are the chemicals in stain and top coat OK for children? That’s my only concern. When I feel comfortable about that, I’m doing most of my house!
What a creative idea, Mandi! Awesome job! (Looking forward to the rest of the room reveal.)
Love it! I got in so much trouble when I was 16 (uh hum 35 now) for ripping the carpet out of my room before the moving truck even started unloading. But much to my moms dismay my faux tile treatment worked out. She still tells me she can’t believe I did that when she had said “don’t you dare”. I love a decorating rebel!
Humina humina humina. I lurve it! 🙂
Have 2 questions:
What kind of a “plastic brush”?
How much sandpaper did you go through?
Thanks!
Robin
[email protected]
I literally gasped when I saw this floor! You’re such an innovator! I would have never thought about a wood pattern like that but you can tell it will really make the room. I LOVE this!
That looks amazing! I recently moved, and decided to have concrete floors poured in the addition to the house, which I ended up staining. I love it! Super durable and easy to clean.
All I could think about was what kind of toxic fumes this will generate for the life time of the paint and you are putting a child in there…..? Seems to me you have opted for esthetic over health.
why would this treatment be any worse than all the other things in our houses? carpet, drywall, drywall dust, painted ceilings and walls, electronics, laminated flooring, vanished wood, linoleum, etc?
After the final cure time there are no fumes, it does take 14 – 30 days or longer to completely cure depending on how many coats you apply, and of course latex is water based paint so the fumes are minimal even wet as long as you have air flow.
Just a note on the longevity of a painted concrete floor – I once painted an entire basement floor in squares with two colors using a primer, regular latex paint and polyurethane topcoat (2 coats). After about ten years (and a bunch of boys spending many hours of FUN down there) it held up very well. It had some areas of wear, but overall still looked great. I did put a large area rug in one area (used for my craft room) and that was a good thing.
I’ve also painted a plywood sub-floor in a bathroom (same method: sanded, primer, latex with urethane top coats). Base color was a wood color and used black & brown colored pencils to create parallel lines that looked like the cracks between hardwood floor planks. Plywood sub-floor gave it some natural wood grain texture. Super solution and lasted for years. Love your creativity!!!!
This looks amazing! can’t wait to try it in our basement!
You are amazing! I love your originality, creativity and sheer guts and energy! Those floors are fab. I just put up a cinder block bookcase (short on funds) and I wonder if you can offer any Mandi advice on adding some spunk to an other wise boring looking shelf?
Beautiful! Thank you for the turtorial! I have been researching painted concrete floors as an alternative to wood in our family room and bedroom. Did you have any tranistions between the wood/tile in the rest of your house? If so what did you use for the transition?
Thank you so much for this post! It was the perfect idea for the spare room in our basement apartment. I got up the courage do use this same pattern and it looks amazing! Everyone is so impressed and the pattern took me just under 2 hours to complete (the room is about 8’x9′) I never would have known how to make this room special without stumbling across this post. Thank you so much!
It looks amazing! And you were so right to switch the colors around. I think my husband would have killed me though. 🙂 You are so super creative and this is my new favorite blog!!
Pretty sure I just peed my pants a little, Mandy! LOOOOOVE this!!!! (:
Wow, that is a super creative idea. Got my brain a working on where I could try this…
Someone might have already asked this question, but I haven’t been able to scan through all the comments so I hope someone will answer it for me. =)
I want to know if the sealer (final step) makes the floor really slippery when wet or if it’s slippery with socks on.
I can see it now…my son running full speed down to his room and then slips and falls right on his butt.(hehe)
I plan on having a rug in the room, but it wont cover all the major traffic areas.
Thank you!
Just found your blog. Love the project and how it turned out. How has it held up over time and use? Want to do something similar in my basement and have found employees at big box stores less than helpful. Is it better to go to a dedicated paint store?
Thanks!
Love your tutorial! I’ve been reading about how to prep the concrete before painting, and I see a lot of sanding and washing and drying time is needed. I only have a week to do this, so not enough time to wash it and let dry for a week before painting. I’ve read this helps the paint stick and prevents peeling, have you experienced any issues with peeling to scratching?
The floors look awesome. I have been trying to get my customers to choose a solid color sealers/paints for a while now. A few of them have, but some are hesitant that it will be to plain. I will have to show them your painted concrete floors; there is practically endless design options when painting a concrete floor like you did.
I, too am wondering if the floor would be slippery. We had a painted garage floor before and it was unusually slick when stepping on it with wet shoes from the rain. I would really love to do this technique but am worried about falling!
Love your project, inspired me to do my own. I have hit a wall though with the paint and not sure how to proceed. I did use SW porch and floor paint….just went to buy the clear sealer and the SW employee told me that it will make the entire floor peel up if I use it. Question is, have you had any issues with the clear coat on too of the paint? Peeling? Scuffs? Anything?
I have had no issues with the clear coat other than a few spots yellowing where I painted it on too thick. There area few scratches but no finish is 100% durable and I think it looks great considering!
xo
m
Thanks for the reply Mandi! I took inspiration from your project and wrote my first blog about it here:
https://myliferemodeled.blogspot.com/
I loooove the results, thanks again for the great tutorial and inspiration!
Need clarification on how you get from light colored striping on dark, to dark striping on white? Seems to have something to do with application of a topcoat.
After painting it gray with white detail I decided that I didnt like it and repainted in reverse. Nothing to do with the top coat!
Our dog sheds!! If we keep him and his hair off the floor for the 72 hours do you think the tackiness of the floor will be a problem for the remainder of the 30 day curing period? I stainedour bedroom floor and was unhappy with the result. I think I will try this. Beautiful job by the way. Thank you for the tutorial
Thanks for the great tutorial! This is the only thing I have found that is really down-to-earth (original plus update) that I think I could actually tackle! Great job
Hey! Just curious how this floor has held up, any chipping or other issues???? we are painting all the floors in all the rooms but the bedrooms this weekend, and I am trying to convince my hubby to use Sherwin Williams over Behr products and came across you post. I use SW for everything, and your pics look WAY better than anything out there, thanks for the info!
ex oh ex oh,
Ruca
Love this. Talked to my husband about possibly painting the concrete in our dining room/den/kitchen instead of spending loads of $ on wood floors and he looked at me like I was INSANE. He said that he couldn’t imagine anything more cold, un-homey, freezing for little footsies and dangerous for our 3 children (all under 4). So, I wanted to ask you what you thought… I see a lot of concrete flooring that does look very modern, cold and unhomey, but with painted stripes or faux bois or a stencil of some kind, it seems to make it feel very warm and yummy. Thoughts?
I live in a beachouse, on pilings. My wife and I love the bottom floor, which is the concrete slab. My wife has decorated with chairs and pots of flowers. I have the grill there, and we just love to sit there and appreciate the view of the water. Anyway, I’d like to paint the concrete. Would I follow the same directions you posted here? It is an outside area, of course. We face a tidal bay, and while there is no salt spray, still salt is somewhat of an issue. Thanks.
Great post and extremely helpful – I only wish I could have printed it to have it with me when I do the project.
Thanks!
Did the final topcoat ever peel off or come up anywhere on this floor? Just wondering. I am about to put a clear coat of concrete polyurethane on my stained concrete floors.
Thank you for your awesome instructions! This gave me the confidence to rip out the OLD carpet and paint until we can put down a permanent solution. You were 1000% right about the Sherwin Williams staff. They were so helpful and we actually timed the project perfectly for the 40% off sale (plus coupon for 10$ off!) This was really important when we ended up doing 4 bedrooms and a hallway!
Thank you again for giving me the confidence to DIY!
-Amy
I agree! The instructions explain the most simple and economical method to paint a floor. It cut through the marketing madness of how and what you need to buy in order to paint a floor. It certainly gave me the confidence to do it myself. I received the best customer service from Sherwin Williams. Roy, the assistant manager, took the time to look at the MSDS data and confirm the instructions. I also was lucky and just happened to purchase the paint during their 40% off sale. I am thankful for finding this info online.
Your room looks great. I have been trying to find a doable way to paint our basement floor. It seems that almost every where I have looked , it says you have to acid wash the floor rinse it with vast amounts of water.
etc etc. It made it sound very hard for 2 seniors in a new house.. Does the sanding open up the pores enough
so the paint will stay on really well?? maureen
Ready to start painting the lines. Any tips on how far apart to space the lines? Love your creative idea.
Thank you for the clear and concise directions and product recommendations! I feel now that I can tackle this project.
I am thinking about doing a camel colored coat, followed by a dark brown coat (which I got in the the “oops” paint section at Lowes for $9.00 a gallon)! I want to then use a “woodgraining” tool before the dark brown dries. Then, do a gloss topcoat, as you suggested.
Wish me luck!
How do you clean your painted floors with the floor sealer on them. I keep getting children’s feet prints all over our large living room which I painted dark brown. I am not sure what to mop over th em with. Also will the feet stop making these prints After 30 day period.
Hey, I painted my concrete floors a year ago. I used a different sealer than you and it is chipping. I am repainting one of the rooms (because I need a color change!! ;)) and am wondering how your sealer held up??
Thank you!!
Vic
I just finished my floor!:) I just need to seal it with the shiny gloss! I had so much fun doing it! Thank you!
I learned about the amazing chemical properties of water in my Geology 101 class and I put that knowledge
to use for this project. I skipped using a chemical stripper and used water to soak and scrape the carpet glue. Saved me more $$$!