DIY Board and Batten is a trend that is all over blogland right now. I really wanted to use it in my house but there was a crapload of measuring and leveling involved. And people were saying that it was taking them forever to do. When that happens my hearing and interest sputter out and DIE.
I do not want to do something that takes forever, so I did Ultra Quick Board and Batten in mi casa. Here is the tut.
*You should know that my husband breaks out in hives when I do anything permanent to the house. So this is a way that renters can incorporate the trend of Board and Batten without, you know… getting evicted.*

As many of you that follow my blog know I am not really the measuring type. And the measuring and leveling for Board and Batten is intense. So I had to find a way to shorten the process. One of my BBFF’s sent me this picture from Pottery Barn and I was so excited! Cause there isn’t so much measuring involved!

So I measured the length of my wall and figured that I needed about 12 boards. I went to Home Depot on a mission to find the cheapest wood ever.
After seeing what the cheapest wood ever looked like I figured I could spend a little more than that.
I ended up with preprimed MDF boards that were 1.5” wide and 10’ long. Each piece was $3.39. For the piece along my ceiling I got the same type of wood except it was 5” wide. You can find it in the same isle as all of the molding. The first thing that you will do is nail in place your piece that runs along the ceiling. Once that was done I measured exactly how far from the base of the molding to the top of the baseboard. Loads of bloggers have ripped out their base board or installed thicker ones to accommodate the B &B but, I am only doing 2 walls and don’t want to have to replace ALL the baseboards in my house. So I cut the base of the slats at a 45 degree angle.

Then I took the width of my wall and divided it by 12 (cause that is the # of slats I purchased) There is a 12” gap between boards. Here is the easy part. Mark your wall. The whole thing. That way you only have to bust out the measuring tape once. Once your wall is marked its time to start laying your slats. I put 1 nail right in the center that way I can level it without shifting the entire piece.

Then I leveled the bottom of the slat. Once all 12 of them were leveled at the bottom I moved in the ladder and leveled all of the top pieces. You have to make it sort of like an assembly line. I used a nail gun and had the entire wall done in 35 minutes.

Then all you have to do is touch up the slats if you have pre painted them or if you are awesome like me do a quick paint job. I LOVE dense foam rollers for anything involving trim.
Plus its awesome cause you don’t have to cut in your ceilings!

And there you go! Because you only used finishing nails instead of liquid nails its totally removable. And I did not caulk the seams for the same reason. If you do want to caulk your seams my friend Beth has a great tutorial.

Do you love the roman numeral wall art? Check back on Friday for the tutorial!

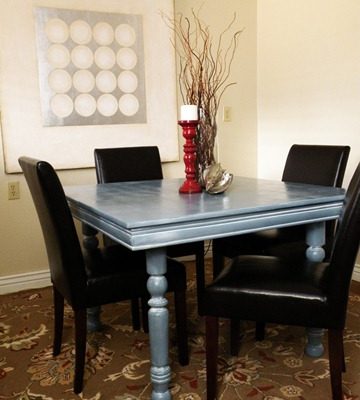
Notice the gray chair in this pic? It was this one. Tutorial coming soon!

Love the faux board and batten….I did this in my dining room ….adds so much character to a room….also love that Home Depot will make all your cuts:-)
Awesome! I love board and batten. I have it on the outside of my house and am in the process to putting all over the place inside (starting with my kitchen back splash and dining nook). I am planning on leaving my original base boards too. I am glad to see it looks so good.
It looks awesome, Mandi!! It’s been so much fun to see your house transform since you started your blog. I love how you simplified your project. Just goes to show that it doesn’t have to be a long, drawn out process to look good. THANKS for the continued inspiration!!
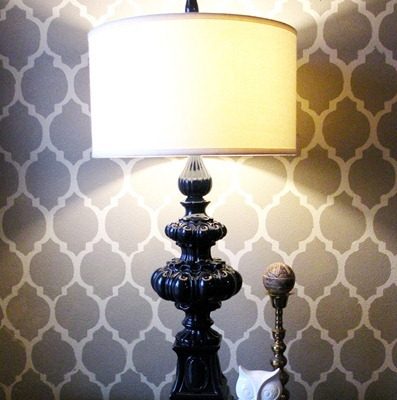
How easy! And it looks great! I will have to figure out where I can use this idea…it’s going into the diy file :0) I am also loving your wall pattern! Is that wallpaper or a stencil? Would love to know the resource…if you want to share. Blessings, Katy
Yours looks just as good as the Pottery Barn’s! I’m glad you didn’t make it permanent. Whenever I hear something is ‘all over blogland’ I promise myself not to make whatever it is. The people who are ripping apart entire walls to do this are going to regret it in two years when a trend goes in an entirely different direction. But you just pull yours down and keep going! Very smart.
Girl I love it!!! You should feel like Miss America! 🙂 Everything you have been doing to your home ROCKS! p.s.-I don’t think that button code is working for the link back? All I see is a ? mark. But thanks for linking up!!
Super job Wonder Woman! I’m with not making any trend permanent as well. Thanks for the tutorial 🙂
Awesome!!! When is your show being shown????
Your living room keeps making me more and more ill. It’s way too cute to be true!
You’re hilarious & a girl after my own non-measuring heart! ha ha! love your blog!
totally love it!! im hoping to do that in our spare bathroom on one wall, we just have to do our flooring first… ughhh!! and btw before i even read that part about the roman numeral wall art i was like dang, i like that pix! I’ll be watching for the tute
Can I invite myself over to your house???? I just need to see it in person!! I’m pretty sure I will never see another house as perfect and amazing as yours! I am seriously in love. 🙂
Your house is gorgeous! You are one VERY talented lady.
When do you sit and relax?!?
Love your bb wall…love your home decor!
Thanks for the tut. You are amazing!
That looks awesome. Congrats on your recent NYC trip and feature! You’re famous, now everyone can love your guts!
i’m going to hire you to decorate my house.
Seriously? That room is amay-zing. Like, have BH&G come over to photograph it and put it on the front cover, amazing.
Mandi! I am so glad I found your blog through one of my friends… I knew you were amazing and talented but WOW!!! You are A.MAZ.ING!! I have LOVED looking through all your posts and loving your creativity. How fun!!
Do you know how much I love it when someone shows me a short cut to doing something I assumed was so time consuming and involved? Thank you! And my husband thanks you too:)
INSPIRED! Love it. Can’t wait for the chair tutorial…just bought a sweet looking pair for $10 and need some upholstery tips:)
Love it! Plus, I LOVE your rug!!!!
PS – can we be friends? I’m a new follower (like a couple weeks new) and you are so stinkin’ cute! Plus, you live in SG and I live in Cedar. It’s meant to be 🙂 But not in a weird way!
This room is so inspiring thank you!