In case you missed this tutorial I did for Ucreate in December here it is again!!
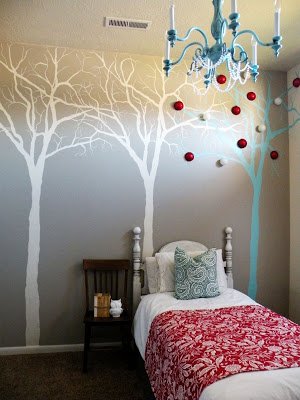
My 7 year old is very opinionated. If she had it her way she would have Selena Gomez and Taylor Swift room….so not happening. If I had it my way she wouldn’t even be allowed in her room. So we had to find a middle ground. And this is what we came up with. A wall mural that she could decorate. Her taste and zero mess.
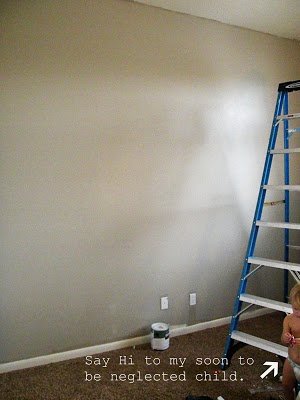
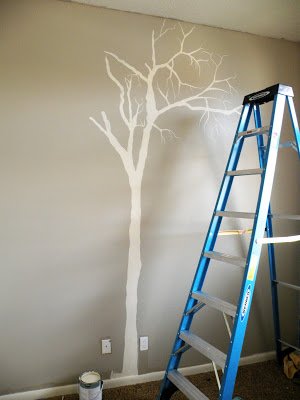
First things first, start with your blank wall.
I found a clip art image online that I printed onto a transparency and then broke into borrowed an overhead projector from my daughters school.
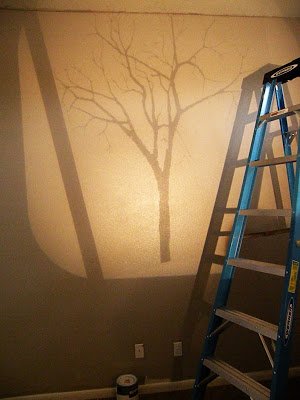
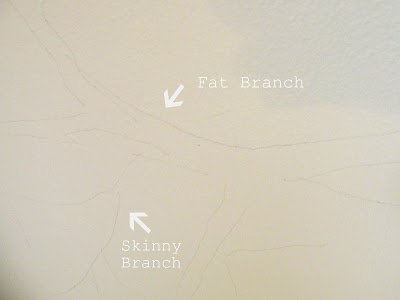
Project your image onto your wall and then take a pencil and rough sketch your tree. This doesn’t need to be perfect (unless you like that sort of thing) On the thicker branches I drew both sides of it, on the thinner wispy ones I just drew a single line to get the shape I needed.
I used some white wall paint that I had at my house and started at the trunk. I used a 1 1/2″ sponge brush to fill it in. (It left really clean lines until I got to the last tree then I had more touch up) You can use this brush to fill in the thicker branches too.
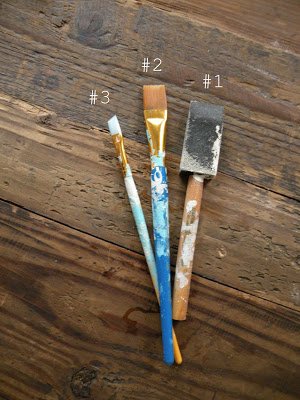
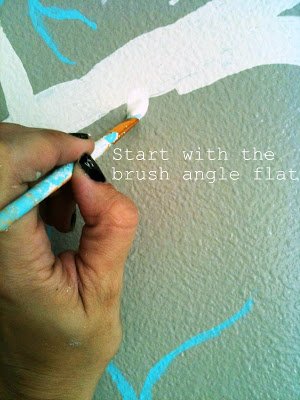
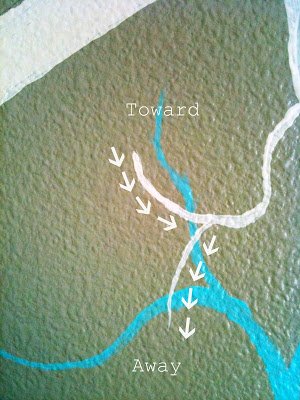
Once I got that done I switched to Brush #2. Its just a 1″ flat nylon bristle. I used this for the medium thick branches and used this technique (shown a a small scale for picture sake!!)
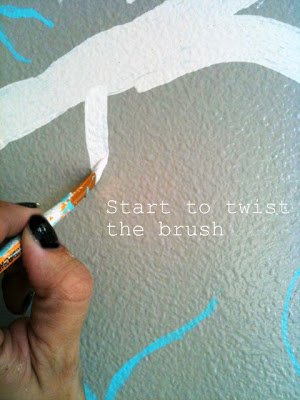
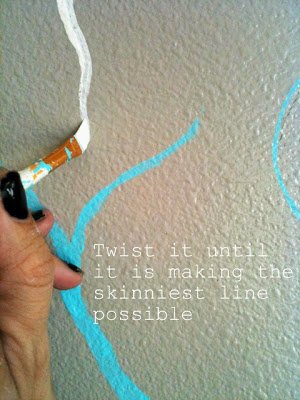
Make sure you are making the line wavy (if that’s the look you want)
To finish off the end of the branch you have 2 different options depending on how you want it to look. For the more rounded edge you will start your brush and pull it toward the end of your branch. To get a more wispy tip just very lightly pull up to finish it.
When you are done with your first tree step back and give yourself a pat on the back! It wasn’t as hard as you thought, right?
Move your projector over and start again.
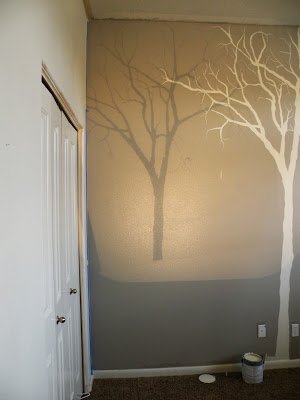
Aaannnnnd again.
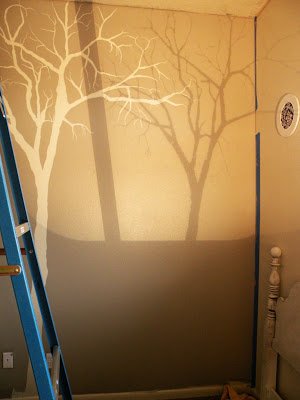
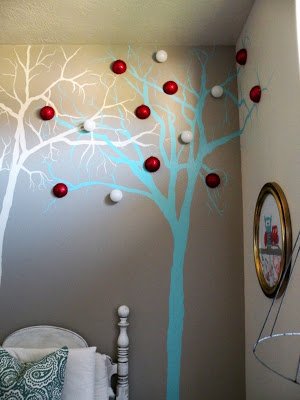
I chose to do the third tree a different color because my daughter and I came up with the ingenious idea of being able to decorate it depending on her mood or the season. I could live with that. She can put whatever she wants on this one tree….the rest of the room is mine. Muh ha ha ha!
I put strategically placed nails to hold all of her treasures and she DIED over it. (well not really but you know….)
So here she is all gussied up for Christmas

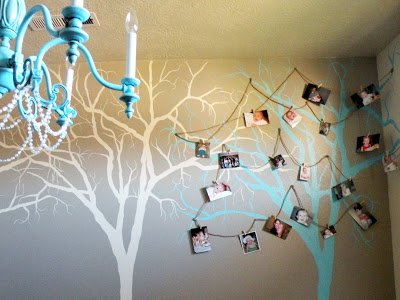
Jute and Clothespins hold all of her favorite baby pictures
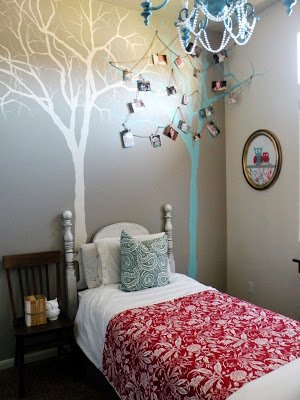
If you want to see some other shots of her room you can {Click Here}


I absolutely love this! The trees are amazing. I may have to try this myself. 😉 Thanks for sharing.
Oh my mercy!! The baby pictures. The ornaments! That is genious!
Genius work lady! It looks amazing!
WOW!!! I LOVE tree silhouettes! I’m totally saving this idea for when we have our own home.
I LOVE it!! Gonna be doing this in my bedroom:-) I just did this same thing in my entry with an Old world map:-)
https://girlinair.blogspot.com/2010/12/i-painted-world.html
Ok now you got me lookin at MY walls!
I think hubby is afraid…LOL!
You did a fantastic job. “pat on yer back”.
LUHV IT! Really lovely.
Alicia {ProtoDoom.com}
Oh ma gosh I love that you did this, WITH a projector! LOL! It is so lovely. And I have taken so much crap for using a projector lately. What? They are awesome! Now I just need to think of a place to do this. . . hmm.
Beautiful! I can’t wait to find a place to try this out:)
This comment has been removed by the author.
Ok, just have to say that the strategically-placed nails idea is PURE GENIUS. Serious.
I am crazy about trees so I just love this! So simple but classy and that your daughter gets to decorate her own way is a big bonus!
That’s what I am working on in my daughter’s room. Loved yours so much I had to copy them.
Great idea!!! I’ve really enjoyed looking through your projects – you certainly inspire me!!
I love this! I think I’ll try this one soon.
Love that you made the 3rd tree a different color and that you can decorate in different ways! So creative!!
Darling!
I wanted to also say that I miss your Junk I Found Link party!! Your’s was the only one like that I could find. Most others are so crafty.
Thanks!I enjoy your blog!
Until I read this I honestly thought you had used vinyl decals for this room, I have to say I love the effect.
Great idea!
I love it! At first I also thought you used vinyl decals. It looks perfect!
I will definitely try it once I have children. Thanks for sharing!
I love this! I have wanted to do this in my son’s room for forever, thank you for sharing how you did it. Turned out great!
Super cute room! But I have to know where you got the owl picture… make it? buy it? my son is crazy about owls and the color red he would love one!
wiegersmama AT yahoo DOT com
I got my trees painted!!! Thank you so much for the inspiration!!
I couldn’t find a perfect tree so I just used your photo..you can even see your ladder in my post…LOL
Im off to edit my post and link back to you…I lost all my favorites when my computer crashed…a reader commented how my trees looked just like yours so I found you again!
https://girlinair.blogspot.com/2011/01/master-bedroom-makeover-part-1.html
this is the MOST AWESOME thing! do you still have the link to the tree you used by any chance?
That is SO SO cute! seriously… like SO cute!!! You did a Fantastic Job!
what color is your wall? i LOVE that grey
Hey I was wondering what is the gray paint color is called that you used on this wall? And is it the same color as your other daughter’s room? I love it so I really wanna know. 🙂 Thanks
You are my Hero and my new favorite read that is awesome…wow…love it..
A Great idea! My compliments to you again. Simple and so effective. Would be great for any room. Cool.
…I am Blue Wolf…
Dang! I wish I’d know you were gonna be on Nate today – I woulda posted my little feature on you yesterday! Oh well – a day late and a dollar short – that’s me.
I’ve done a few tree mural tutorials and I’m convinced my readers think it’s tricky. Your post is awesome! I love the directions you give for branches! So I HAD to feature this tutorial :p
Love the decorating of the third three too. Great touch.