Thanks to everyone who voted for my project this week! I am extremely excited, humbled, and baffled all at the same time!
DISCLAIMER: If you are one of those “sewers” that pins and measures and junk YOU WILL HATE ME. Like as in DEATH hate. I am so sorry! I don’t really know how to sew, I just know how I want things to turn out and work backwards….I still love you though!
The most important thing to remember during this tutorial is all it is are STRAIGHT LINES. That’s it. No awesome techniques, no weird stitches, nothing like that. Straight lines with a straight stitch.
Now that you have been properly prepared lets begin.
The fabric that I used:
The white quilted and the touches of Hounds tooth were from my cute Grandma. (free!)
The Black and White Swirls are from Ikea (when I bought it a few months ago it was on clearance for $3.99/yd)
The green zebra is from Joann’s. (I think around $9.00/yd but I used a 40% off coupon)
The Gray Chiffon is also from Joann’s ( $.99/yd)
I got all of the fabric in my sewing room that “went” together and laid it out on the bed so that I could change the order etc. before I started sewing.
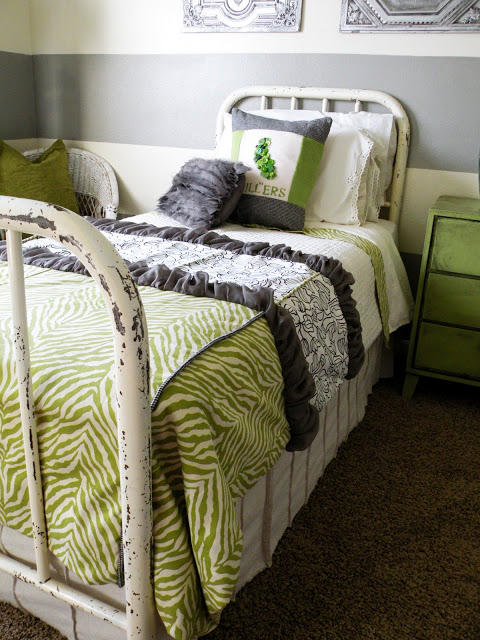
Then I laid out a top sheet to see how big my duvet needed to be. (Crap, first hurdle none of my fabric was the right width.) So I figured out that if I cut some from the bottom and moved it to the sides then it would be the right width. But hello that’s not cute! So I made some contrasting piping to join them together.
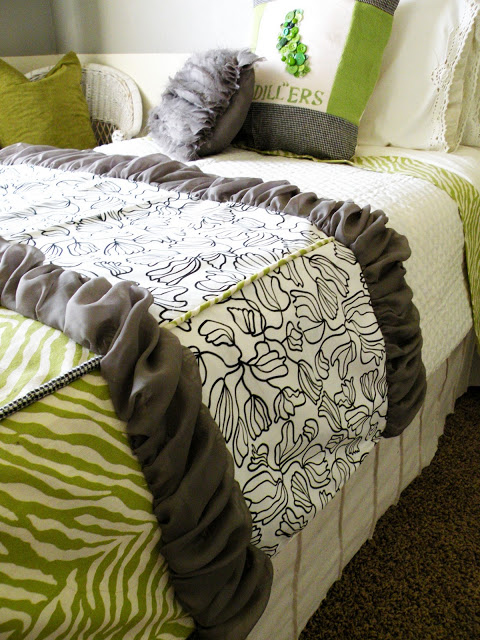
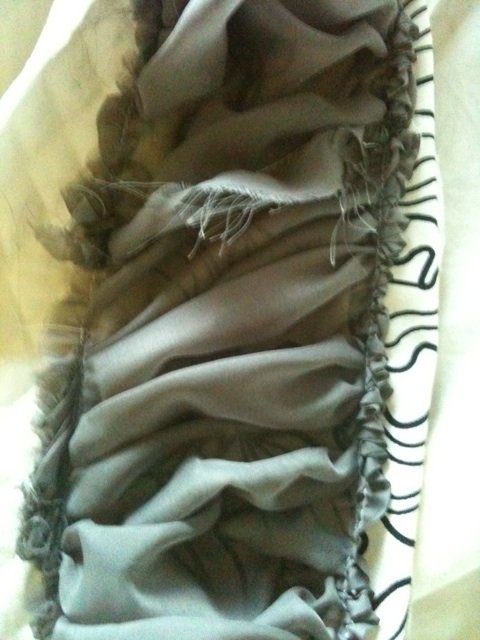
Now for the ruffles. I used chiffon because when you wash it it still has life. It doesn’t get all matted down like ruffles do that are made out of other fabric.
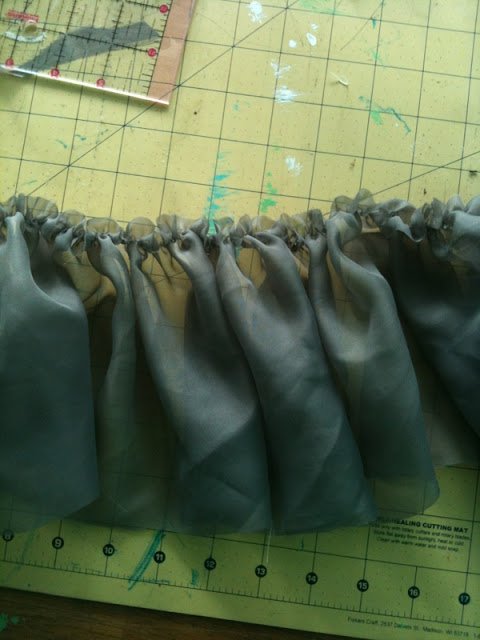
I cut 4 6.5″ strips that were about 4 yards long each. I joined 2 for each stripe (end to end)
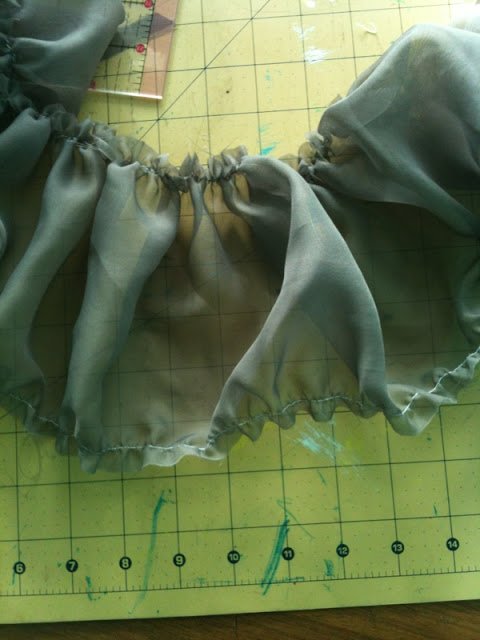
then i started ruffling. *If you have a ruffling technique you love use it! I am sure its better than mine…If not then here you go.)
Set your stitch length as long as your machine will allow. And set your tension as far to one side as you can without your thread breaking. I set mine to +2. Your fabric should ruffle itself. If it doesn’t or if its not even, (because lets face it when do things ever work out the right way?) you can hand ruffle it, its no big deal.
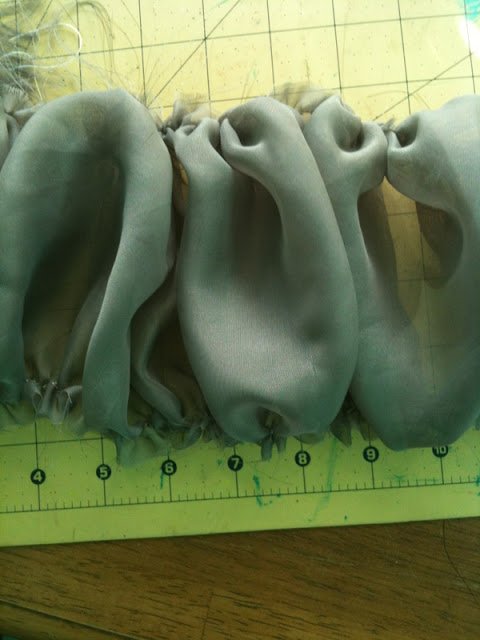
Then do the same thing to the other side:
This is what it will look like when both sides are ruffled evenly:
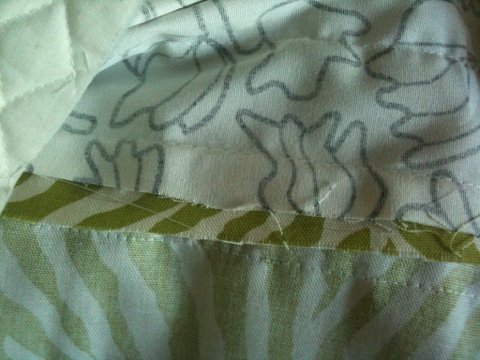
The next step is to sew the ruffles onto the normal fabric. I sewed mine in about 3 inches from the edge, right sides together on each of the pieces.
*IMPORTANT! After you have one side sewn lay it out flat and make sure the ruffle is straight across itself.
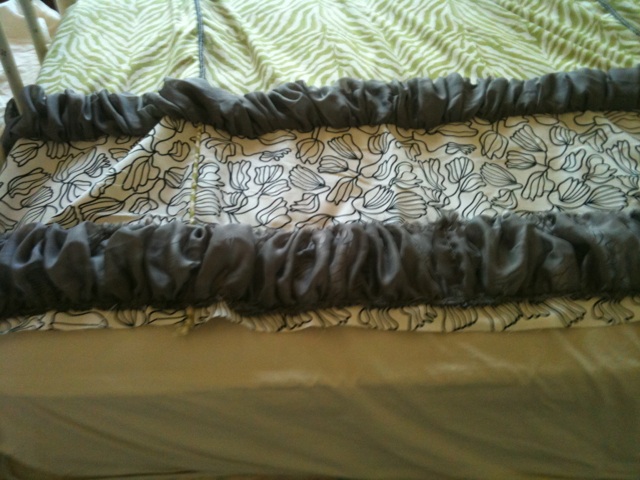
Otherwise it will look like this when you sew the other piece on….
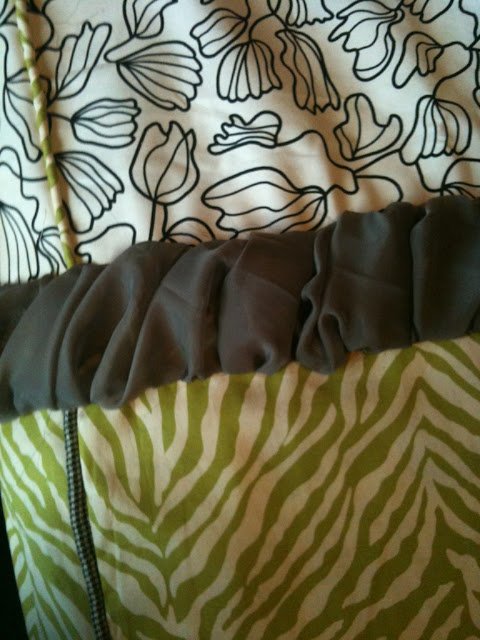
See how its not straight? Oopsie.
Then do it to the other side. Right sides together and in about 3″.
This makes it so that the ruffled piece is connecting the other two.
Then I sewed down the edges of the overhang so that the ruffle was not the only thing holding them together 🙂
Do this for as many stripes as you have!
MAKING IT A DUVET:
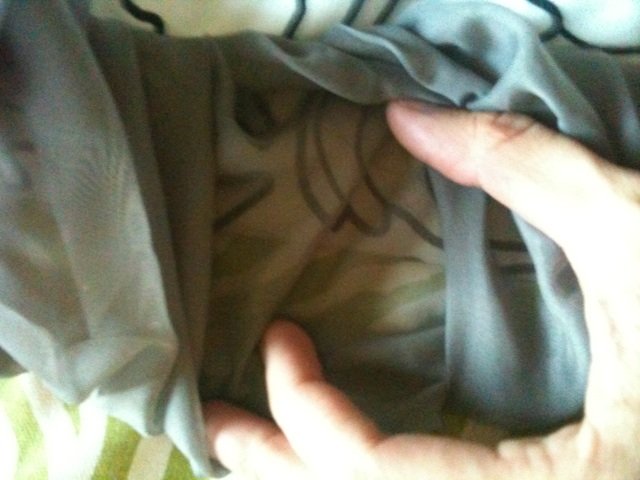
OK so you have the top of your bedding done. The next step is to make it a duvet by sewing a flat sheet on the back. I laid the top piece out on the bed (right side up) and then laid the sheet down over it.
Then, because I didn’t have pins I used painters tape to hold the 2 pieces together….
Do you hate me?
I hope not!
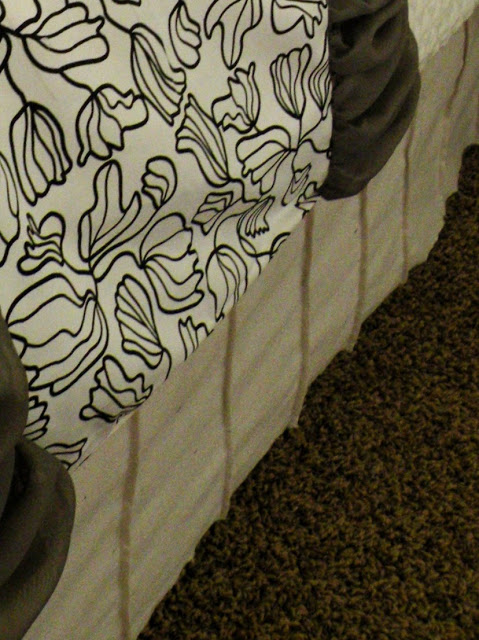
You will stitch around the 2 sides and bottom, trim the excess and flip it right side out! I left about 8″ at the top of the flat sheet (the length of the top was 8″ shorter than the sheet) so that I could fold it down over the opening of the duvet. I did a super large binding on the top of the sheet in the green zebra so that it was well, you know, cute. Just remember to not sew the top shut…otherwise you wont be able to get your comforter in! Ta Da! You survived this crazy tutorial!
The drop cloth was originally going to be one of the fabrics on the duvet. I had pleated it perfectly but it just wasn’t working so I took the stitches out of the top and bottom that held the pleats in To make it look like mine, all you need to do is measure the distance that you want between pleats and mark it. Then iron where all of your marks are and sew down them. Really that’s all there is to it. Then just tuck it under your mattress.
My daughters name is Dylan she is the cutest thing ever, see:

She has the most heart wrenching little raspy deep voice. Its makes you want to suck her cheek off. When she wakes up from a nap she always says “I mish you Mama” Love that baby!
I digress.
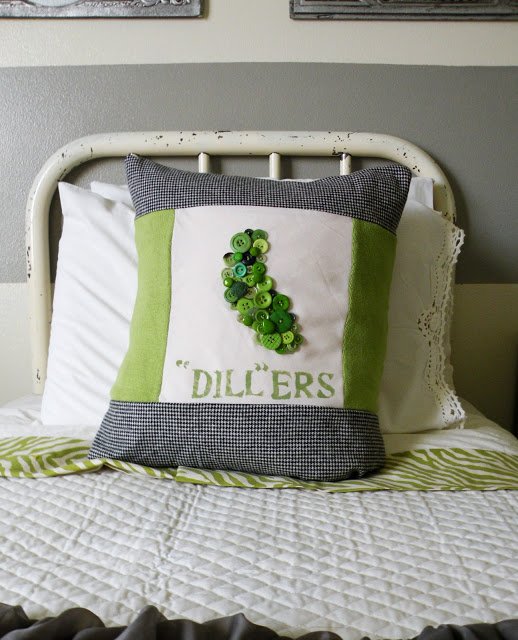
So her nickname is Dillers, and keeping with the {Thrift Shop Glam Rules} I needed something quirky and unexpected in this room. Enter the Pickle Pillow.
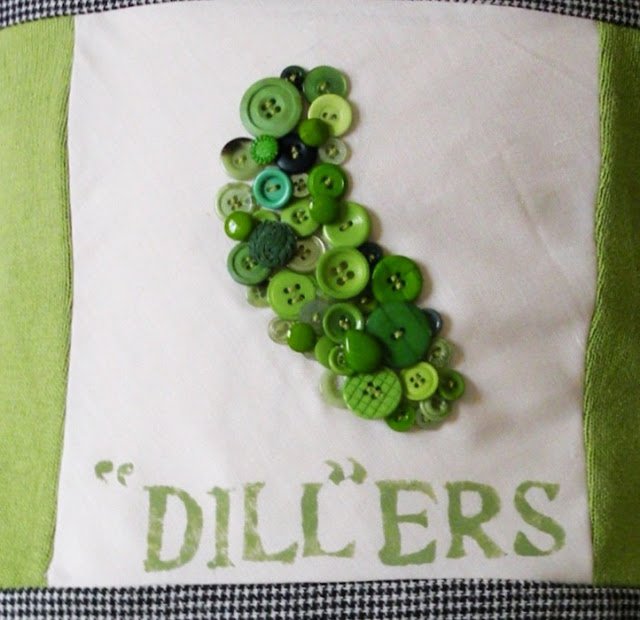
I went on a treasure hunt through all of my buttons and got literally every single green one. Then I just kind of moved them all into a pickle shape. No technique involved. Just formed it into the shape I liked.

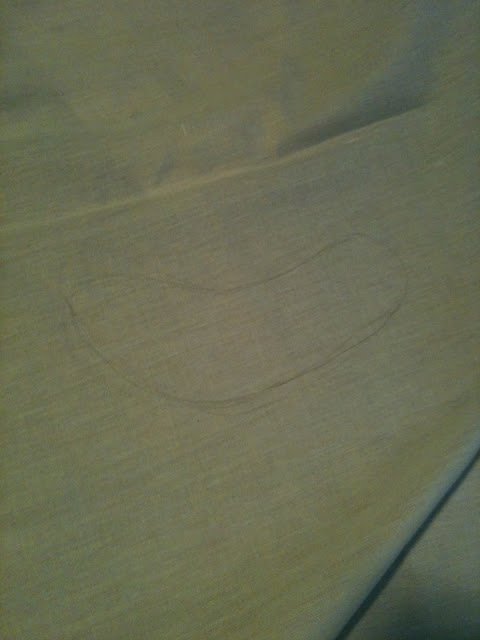
Then I drew on my fabric a shape similar to the shape and size of the one I made out of the buttons.
I started with the large buttons and positioned them about the same spot where they were in my formation on my fabric and stitched them on.
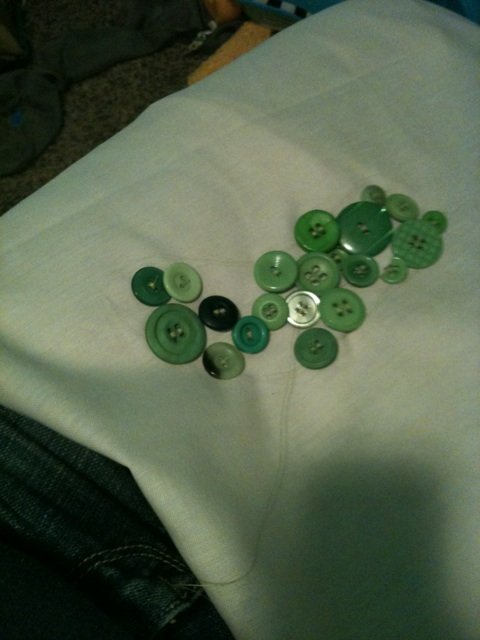
Once the large buttons were in place I worked my way down to the smallest ones and filled in as many empty spots as I could.
Then I used the raised buttons to fill in everything else. Easy peasy.
I printed the wording off on my computer and cut it our of freezer paper with a razor blade. Then I mixed blue, yellow and orange paint together cause I had no green. Thank goodness for Preschool! This is an awesome tutorial on {how to make freezer paper stencils by Char @ Crap I’ve Made}
Then I used some left over fabric on the edges and made a basic pillow cover {awesome pillow making tutorial by Brooke @ All Things Thrifty}
and you are done!
If you want to know how to make the gray ruffle pillow you can find my tutorial {here}

I apologize again for any lack of information in this tutorial. I don’t technically know how to sew, if you have any questions you are more than welcome to email me and I will help you the best I can!


You are my kind of sewer! Congratulations on an amazing job!
Mrs BC
xx
You may not ‘know’ how to sew, but WOW. So creative and the combination of fabrics is awesome. I don’t think I could even make a plain throw pillow. Love it.
Seriously, your site is my new obsession!! You’re amazing! I’m your newest follower. = )
Mandi, great job!! I loved this entry!! – – Mandy, Sugar Bee Craft Edition
Somehow I knew that was yours. My favorite!
You are my kind of sewer. I’m a hacker. No patterns for this chick!
Congrats!
This is BEAUTIFUL… you should become a professional…sewer
I kept waiting for the messy house, but didn’t see it. This was awesome, love the pillow, and I love what your daughter says to you when she wakes up from her nap;)
I voted for you! Yay! I knew that one was yours! Soo awesome!
Gorgeous!!! You had my vote! 🙂
I sew like you. The finished project turnes out how I love it but don’t dare look on the other side. I make things all the time like this. So I am right there with you! I love what you have done. good job
http://www.paintedstudio.blogspot.com
Cheryl
I just love this!! I have been trying to decide how I want to make my daughter’s bedding, and you just made it look so easy!
How are you so AWESOME?? Everything you touch beautifies 🙂 LOVE, LOVE, LOVE it!
Truely awesome!! You got my vote this week! And I am your newest follower! 🙂
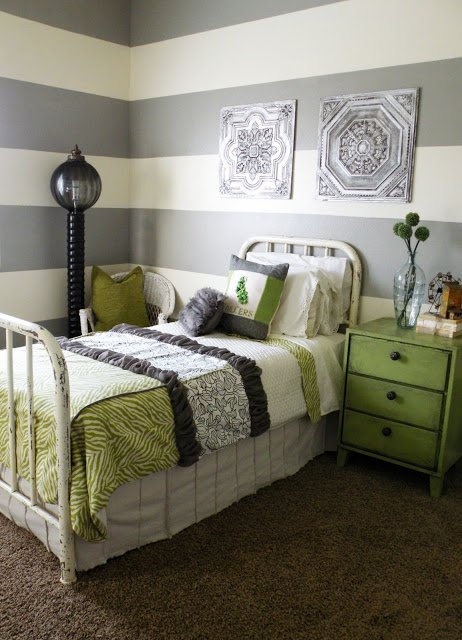
I LOVED this!! Totally voted for it. Question: what is on the wall above the head of the bed, and where do I get those?! I HAVE to know!! 😀 Thanks!
Your bedding is so so cute!! I love that chiffon ruffle. And that you made the whole thing out of your stash. Very cool!
I continue to be impressed with your original and innovative ideas. I am thoroughly impressed that you did this with scraps. ( You don’t even want to know how much I spent on my bedding). Congrats on the finals, I know you will continue to rock it. I can’t wait to keep checking in with you and your stylish blog!
Thanks everyone for your sweet comments!
Nikki asked what those were above the bed. They are celing tiles that I found at the thrift store for $2.00 each. I spray painted them silver and then glazed them….surprise surprise! If anyone ever finds more I will buy them from you!!
love your guts
mandi
Okay so I was going to comment about some stuff but the post was so full of awesomeness that I can’t remember what I was going to say! Oh ya..
I hate to pin and follow patterns too. Result: a lot of ugly crap but some good stuff too. But I HAVE to pin ruffles to get them to look good. Seriously tell me you didn’t pin those ruffles.
I think just by looking at this project you could count yourself as a sewer. This duvet is so cute! I love it!(I also HATE pinning)
First, you are funny. Second, I love the pillow. And third, I sort of sew like you do–it’s really more fun that way. No bounderies to get in the way and all that. Plus, when you screw up sometimes it turns into a whole other cool thing you didn’t plan for. Win win.
Jenni
House of White
I just love the project Mandy and it has your style all over it – fun, fresh, and innovative.
I love that you tackle a project with reckless abandon and don’t care about no stinkin rules about pinning!
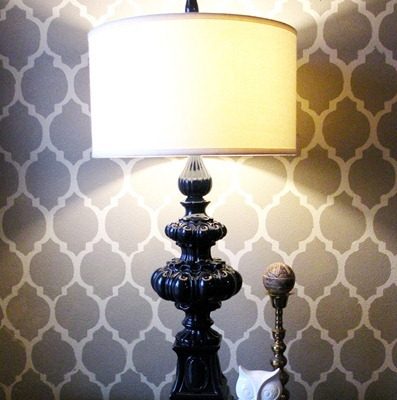
I must admit that I scanned the pictures first before I read any of the descriptions and as soon as I seen the lamp in the picture, I giggled and said “yup, thats Mandys” 🙂
But I would have picked it regardless, I love the fresh happy greens!
You did a fantastic job. The Dill pillow is perfect and makes it so personal.
Looks wonderful…great, great job.
Wow, Mandi. I love the way this turned out. Great fabrics & details. Thanks for sharing!
Warmly, Michelle
I have been hunting and searching for the perfect bedding for my girls’ room. I finally found the idea! Thank you for sharing. It’s perfectly perfect! And I sew the same way.
You know that I think you are absolutely amazing right? RIGHT?
Featuring this beauty!
So happy to have found your blog and this post! I LOVE your improv style to crafting and glad I’m not the only one out there who makes it up as she goes. This duvet is freakin’ gorgeous!
When I first saw this duvet, I literally gasped. It’s like you took all the ideas that have been floating around in my head for my girls’ room and brought them to life. I thought I was insane for thinking I should make a duvet out of a sheet and scrap pieces of fabric and adding ruffles into the chaos! But here it is! And it’s so so so so so pretty! And I sew exactly the same way…far too impatient for the whole “pinning” thang. You’re a girl after my own heart. I’ll let you know what I come up with. I have to do mine x 3, though (twin bunk beds and a toddler bed). Yikes!
aloha,
charlie
I would say I’m a sewer, but I hate pinning as well and try to avoid it whenever possible. A bit of wonkiness is usually fine with me. 😉
Just stumbled across your site. I love it! And I’m your newest subscriber. 🙂
Love this room! I appreciate the no pinning, no pattern sewing, make it up as you go. I make slipcovers for a living and that’s how I do it. I sew everyday, but give me a pattern and I’d probably stare at the directions for a day. Great job on using what you have.
https://customslipcoversbyshelley.blogspot.com
I LOVE this! I’m trying to update my bedding and this post has become an inspiration. Ohh, I can’t wait to go find some lovely fabrics to use on this project! I’m definitely going to follow your blog. Thanks for sharing 🙂
I absolutely love, Love, LOVE this!!! Its incredible! I am curious to know what color and paint brand you used for the grey stripes? I have been looking for the perfect grey and I think I found it!
I LOVE this room! What is that tall black thing, is it a lamp? Also,did you paint the nightstand? What color is it?
I love what you have done!! My daughters name is Dylann too! We call her pickle : ) You have some very inspiring ideas! Aja
https://ajaleesweetlife.blogspot.com/
amazing and adorable!!! for not knowing how to ‘sew’ you sure did a great job!
Where is the nightstand from? I need it in my life!!
Very useful tips for make your home more attractive.I think that is so great! thanks for cooperation.
You did a great job!!
I love it!! Every last thing about it especially the pickle pillow, oh so cute. I love that you dive in and throw caution to the wind. I have sewn most of my life and what I find with most people (mostly my mother) is that they think if they don’t have a pattern then they dont’ know how to do it. I say if you know how to thread a needle the possiblities are endless. Just make it happen. You go girl! Just found your site an am an instant fan. I’ll be looking for yo uon Nate Berkus
I’ve had this saved since you first posted it, just gorgeous girl! I linked it to my project: bedding post too – well done!
Love your pickle button pillow ! Blogged about it on BUTTON WEDNESDAY: https://kraplap.blogspot.com/2011/03/button-wednesday-pillows-iii.html . Enjoy !
love the gray stripes. what was the color and how did you measure them out? also saw you on nate and loved the stenciled pillow are you going to have a tutorial on it? Love love your house i would not change a thing!!!! Do you have any ideas for 2 tween boy rooms?
WOW! LOVE IT
how do you think this would look as curtains?
because i see it on my walls that i’ve been putting off until i found the perfect look!
Awesome thanks so much for the idea!!
you are soo my new idol!!!
Wow that is awesome!I can really relate to having no sewing experience and straight stitching, cuz that’s how I’ve always done it!
I have soooo much extra fabric, but I cant sew that well, I need a buddy like you to show me!!
Read your blog daily! Question… can you show me any pics of the rest of the room. My 8 year daughter swoons over this space. We are trying to recreate it, but I’m stuck. How did you work the window? Thanks for the wonderous inspiration!
i loooooove everything about this room! those stripes are inspiring me..i’m wondering if you’re gonna do a post with more detail on the room? maybe you already have somewhere..still looking. but if not, will you? please? i will promise to be your number one fan and read your blog every day and drool over your stuff. sound good? but seriuosly..i will. and i want to see close ups of some of the other stuff in that room. is that possible??
Mandi, could you please tell me the paint colors you used for the gray and white stripes in this room? I would so love to duplicate it in exactness since it is TDF – TO DIE FOR! Pretty please?
Hi Miss America,
I’m going to feature you this week.
Here’s your code for your ‘I’M FEATURED’-BADGE, to show it off on your blog: https://www.finecraftguild.com/mothers-day-linky-party/
Congrats!!
Great work.
This is ridiculously awesome and Epic! I have been wanting a new bedspread for at least 85 and hald years! (i’m only 26 though… hmm)ANyways I am totally linking this up to my blog and it is going on my list of what I want to do for the summer!!! 😉
Thanks!!
oh… here’s my blog, I will come back and relink with the link I post this too…
http://www.periwinklepixies.blogspot.com
As Promsied… here’s the Link!
Thanks! I don’t have an “I’m Featured” button yet, but I am making one! 😀
https://periwinklepixies.blogspot.com/2011/06/what-to-do-s-plus-awesome-tutorial.html
Ruffles, one way to gather fabric is with clear elastic. If you had 24″ of fabric, you could use 12″ of elastic, plus half an inch at each end for a little handle. That would be a 2 to 1 ratio. After you sew the ruffled fabric to the main piece, you trim off the excess, including the elastic.
…One time I did this, I used wash away thread, and was able to re-use the elastic.
…and you only have to use a straight stitch, so that’s easy.
…don’t they sell ruffler attachments for sewing machings nowaday? Wouldn’t that be the easiest way to make ruffles? I’m old, so I really don’t know 🙂
…I go by the name Blue Wolf…
I love this! I had to make my own version for a gift.
https://www.ninthstreetnotions.com/2011/08/queen-size-duvet-cover.html
This is amazing!! Just another idea to add into my “Girl’s Room” storage in my head! 🙂
I love this duvet cover and I’ve been looking for fabric to fit in my toddler daughter’s ‘big girl room’ to cover a black and white polka dotted comforter for a while now. I finally found some I thought would work well with her room. I got home and laid it on the comforter when I noticed that it was very, very thin. Low and behold, you can see everything right through it. I had to have 3 layers of fabric for it not to show through. I tried medium weight interfacing behind one layer but it didn’t help much. I’m very new to sewing and I don’t know what to do. Is there anything that can be done or should I move onto another fabric? What types of fabric should I be looking for? Please help!!
Most of the fabrics that I used were really think upholstery weight. The best option would be to buy a white comforter at Target for $25 and make the bedding that you want!
Loved the bedding!!!! This gives me an idea for my daughters daybed. And like you I also work backwards. LOL Thanks!
Maybe I’m just blind and missed it but how do you do the piping? I love your tutorial this is just my style I hate patterns and measuring and crap