
WE ARE THE CRAFTING WITH THE STARS SEASON 1 CHAMPIONS!
I just need to start this post with a BIG FAT THANK YOU!
First of all to {Tam @ Sew Dang Cute Crafts} for coming up with the ingenious concept of Crafting With The Stars. I am so grateful that I had the chance to participate.
Second to {Becca @ Blue Cricket Design} for being the BEST Star partner that a girl could ask for.
Third to the other contestants for bringing your crazy skills and making me step up my creativity.
And fourth and MOST IMPORTANTLY….You! Thanks for cheering me on and voting! For all of your kind words and still liking my blog when there hasn’t been too many “Meaty” Posts. You are the best virtual friends that I could ask for! Now on to the Tutorial!
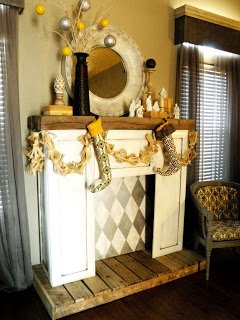
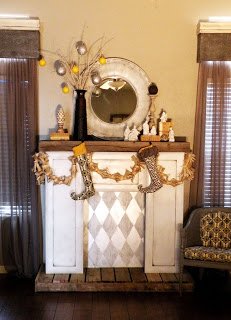
Mantle Surround:

So when I was trying to figure out what I could submit for the Christmas round at CWTS it took me a day or two to figure out exactly what I wanted to do. I was looking at blogs that inspire the crap out of me and {Ms. Funky Junk Donna} has been on my mind lately. Originally I was going to build the entire fireplace with pallet wood but….that just wasn’t {Thrift Shop Glam} enough.
As I was looking around my house for inspiration I saw {these} and it hit me like a ton of bricks. Cabinet Doors would be perfect! Now to find some….. Of course they didn’t have any at the thrift store. So I called a few cabinet shops to see if they had any left over from an uninstall or anything. One did. Drew’s Cabinets, they were so nice and I got 9 cabinet doors for $30.00. (If you live in St. George they still had some more.)
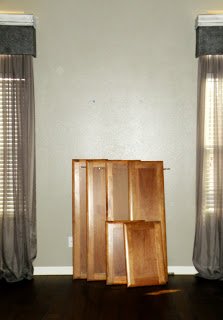
You will need 4 doors that are the same size and one smaller one to connect them.
I started off by washing them and priming them with Kilz Spray Primer. Then I used the only kind of spray paint that I will use Krylon. In Classic White.
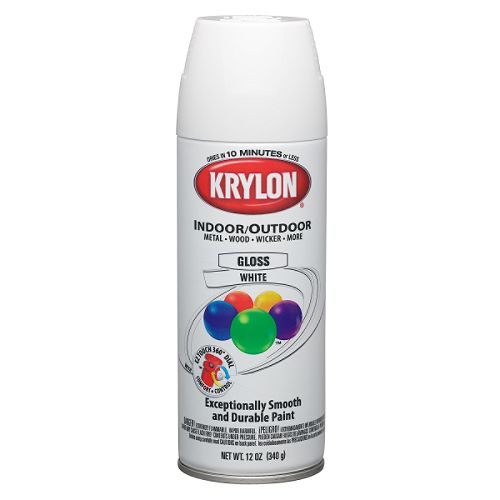
Their nozzle is by far the best. Their coverage is by far the best. Their true-ness to cap colors are by far the best. Their price is….well you know where this is going. After a couple of coats and adequate drying time I glazed them with my BPF (Best Paining Friend) Ralph Lauren Faux Glaze in Black Silk. I used my {Flat Surface Glazing Technique} and this is what they looked like:
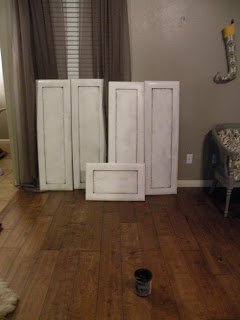
Now is the fun part. I went to Home Depot and bought some L brackets and Straps (I think that’s what they are called) Then….ALL.BY.MYSELF without my husband I used 2 of the doors and had them meet at a right angle. I put the edge of the back piece on the backside of the front. Then all I did next was screw 3 L brackets on each corner (top, middle, bottom) and then I did it to the other side. (Sorry no pics.)
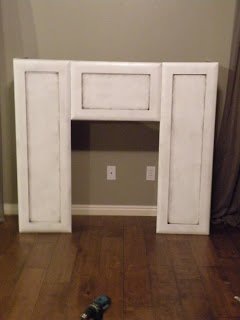
Once they were securely in place I laid them down with the front sides on the ground and put my middle piece in between. I used the metal straps (4) and secured the center piece to each of the side pieces. Stand her up and she now looks like this:
Pallet Hearth:
At about this time Macho was getting home from work….hee hee hee. So outside we went to work on the pallet wood hearth. Before he got home I sanded the crap out of it so that little toesies wouldn’t get slivers. I put his muscles to work pulling the pieces off the back and by the time I got back with my camera he was already to this point:
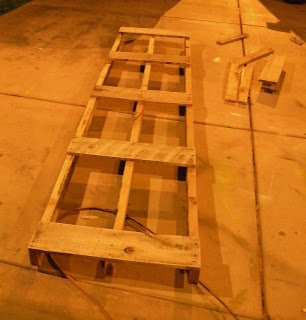
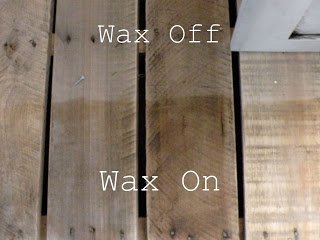
Good job honey! I decided that I wanted the hearth to be about 4 inches longer on each side than the mantle surround and it magically worked out that way with the wood. Some things are just meant to be I think. Long story short, he cut down the long support boards, nailed the short boards between the ones that were on the top side already, and put a short board on each end. I need to do something to the wood to make it look finished but not new, so I went to Home Depot and got Minwax Paste Finishing Wax ($9.00). Its basically, well, wax that you rub onto the wood with a soft cloth, It kind of brightens it up without making it look unnatural. Its perfect for pieces that you want raw wood.
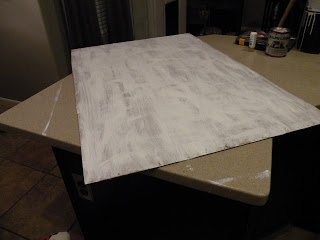
Painting The Background:
So whilst Macho was slaving away in the cold night I was nice and warm in the house painting the silver and white harlequin background.
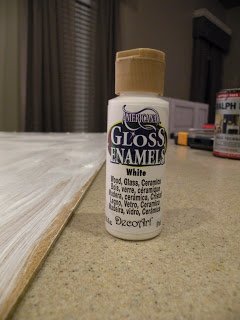
Get your gear. I LOVE Americana Gloss Enamels Paints. They are really thick and glossy and don’t have that uber matte finish that regular acrylic paints have. I just dry brushed it onto my board so that it was streaky and oldish.
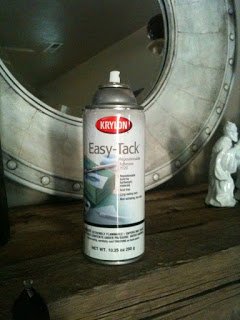
There are quite a few different techniques on painting Harlequin Diamonds…most include math. Not happening on Vintage Revivals. So I cut a diamond shape out of some plastic folders I had left over from my {Seizure Wall} and used Krylon Easy-Tack Spray Adhesive to hold it in place.
Then I stenciled Deco Art Dazzling Silver around the edges of the diamond:
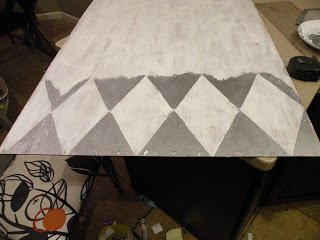
(The white is where the pattern was, you can see on the top row how its only covering the edges, once all 4 edges were painted on I filled in the center) Looking back I should have drawn lines to vertically line the diamonds up….but I didn’t and they ended up getting a little wonky the last row…. no big deal to me but to those who might be a perfectionist, potential melt down moment.
Mantle Shelf:
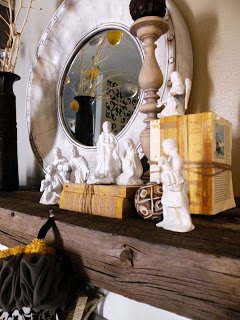
This is where Donna @ Funky Junk comes into play. Have you seen her {mantle}? It is awesome! I knew I wanted the chunkified-ness and rusticallity (not a real words) of hers.
For the top of the mantle I used some super old 4×4’s that I got from my husbands Grandma. We (meaning Macho) cut them so they were 3″ longer than the cabinet doors on each side. Then we used L brackets and straps to mount them to the cabinet doors and to the studs in the wall.
How many of you have husbands that flat out say they dont like something? In normal circumstances mine is very open about his opinions but when it comes to my “decorating skills” he just repeats the same things like for the mantle top he just kept saying “its really thick.” and then I would say “I love it, its perfect!” and then he would say “ya but its really thick….” LOL oh husbands they are just the best, right?
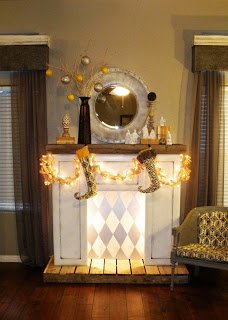
To light it up I just put 2 bunches of white Christmas lights in the corners, so simple and so pretty. I have plans to put something on the sides of the background connecting it to the front of the fireplace but I have too much going on to do it this week. When I do I will post an update.
Check back tomorrow for a full tutorial on how to make a {Miss Mustard Seed} inspired book page garland!
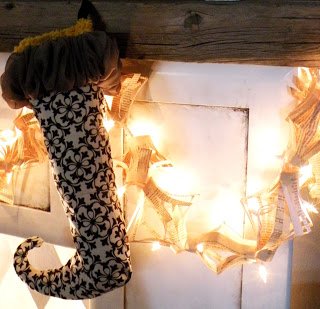
UPDATE: Here is the link for the {Book Page Lighted Garland}
![]()
Linking Up at the parties on my sidebar and the DIY Club Nov. project party
worth $1,500! Bring your projects too!


Congratulations, Mandi. Your projects were amazing, and it was a joy following you throughout the journey. Way to go!
I was hoping to be the first to officially congratulate you! Congrads to you and bummer to me! Great idea! Great tutorial!!!
~**~WOW!!! It is amazing!! Love it~*Hugs,Rachel
CONGRATS!!! I so knew that was your genious work
congrats! I totally loved it!
Congratulations!!!! I loved all of your projects! GREAT work!
That’s really ingenious! Great job and it must have been fun working with your hubby on this project! It looks really amazing, I think Donna @ FJ would be impressed!
Mandi, you’re awesome!!! Congrats on the big win -Mandy, Sugar Bee Craft Edition
This project TOTALLY amazed me. I seriously wish you lived near me so you could help me come up with an alternative headboard for my new king bed! The hubs and I started one this weekend but it was a major fail. 🙁
Anyway – congrats on the win!!! You deserve it.
Congrats! You had my vote! 🙂
Love this! I have been waiting for my hub to build us a faux fireplace, but maybe I can get it started using your method! Thanks!
I hope you don’t mind me featuring it today!
Have a great day!
Tasha
http://www.dotdotdotthis.blogspot.com
Congrats! I knew you would win!
Mandi, this is just AMAZING! A fabulous makeover for that wall. I love the addition of the Christmas lights inside the fireplace. Its so warm and cozy!! Congratulations, girl!! Well deserved!!
You blew my mind with this one, Mandi!! SO awesome!! You’re going to win the DIY Club this month, fo sho!
Okay, well I featured you over at Sassy Sites! So, come by and grab a featured button! xoxo!!
Fabulous project — so unique and beautiful! Congratulations!!! And… I agree — Becca is incredible and she is wonderful to share her talents with us all so willingly!
YAY!!! I LOVE your fireplace and was obsessed with having one as soon as I saw it… We’d already been planning on building a fake mantle, but this is a FABULOUS idea. You rock girl! Congrats!
Congratulations! This is fabulous!
congrats! My husband is the same way with comments.. that’s how I know I am on the right track 😉 This project makes me wish I didn’t have a real fireplace lol
I voted for that one! Good job…love it.
unbelievable. ridiculous. insanity. congrats on the win, and this bad ass mantle!
well you are just too cute and too funny for words! I love your mantel- what an incredibly creative idea!! I go to a wood bargain shop for old cabinet doors to make signs, and I was thinking I could do something similar, but then I remembered I probably couldn’t find three matching pieces there. I will have to keep this idea tucked away…nicely done- found you through Sassy Sites. 🙂
Well Miss Mandi! Way to go! CHAMPION! I knew you would win! You brought the whole competition up 10 notches! Good luck on Studio 5 – I’ll be watching for you!
Congrats Mandi! That’s so exciting! You did such an amazing job on CWTS! Next season, I guess you get to be the star! Thanks for all the great ideas and tutorials!
yes!!! woo hoo!!! i totally voted for this project! i thought it was yours. you are so crafty and creative, and have so much to be proud of. rock it, girl!
totally cool and fun, great idea, love it!!
alicia
Does that creative mind of yours ever rest? I hope not because it is constantly inspiring me. Thank you for sharing a piece of your creativity on the Boardwalk Bragfest today.
This is amazing. Way. to. go!!!
That looks awesome! You are so creative. I would’ve never looked at cabinet doors and thought they were perfect for building a mantle. You are a genius!
I am featuring this and all your CWTS projects on somedaycrafts.blogspot.com. BTW, did I ever mention that I see you being a future “star” on CWTS. Just saying!
I am SO stinkin’ proud of you! NIIIIICCCCEEE:) This is dang hotdog cute. I love it all. GREAT JOB! SO, I think we are heading up AFTER my hubs’ parents get back from their mission during the first week of January. Hopefully we can meet up. Maybe even do a DI run or somethin’. Love your CRAP;) Talk to you soon!
Jen
You are FREAKING AMAZING! I love it! Thanks for inspiring me!!!!
I am SPEECHLESS!!!!! This is a PERFECT solution to my desire for the look of a fireplace!! We’ve never put one in because my husband is so cold blooded that we’d never be able to use it. (He’d roast in the Arctic!!) But, OH! how I have longed for one…..just for looks!
oh this picture makes me want to stalk your address and come live with you….i could sit and stare at it ALL DAY long! It is amazing and awesome and in an ironical twist – I actually got to here from a link on Donna @ Funky Junk’s blog!!!
Ok now I am off to go scrounge around the cabinet section at home depot…
thanks for the amazing inspiration and eye candy!
Yay! You did a great job on ALL your projects! You deserve it! And you got paired with a great star too!
I’m a new follower! Love this and your entire blog!
Mandi – congrats! You are so clever. This is gorgeous (as usual)! Great job!
Roeshel
Awesome idea! 🙂
Another thing to light up the inside, use a thing or two of Sterno and put ceramic logs in front so they are hidden. Looks like a real fire!
congrats!!! I voted for you! I needed that tutorial years ago when I lived in a home with no fireplace!
Congratulations!! It was so fun being a part of this competition and I loved getting to know everyone through it:) It was so fun to see everyone’s personal crafting style!
HEy Mandi- JUst wanted to let you know I featured your awesome fireplace and garland on my blog yesterday. Hop on over.
Rock n Roll Mandi–thans for sharing this on the DIY Club. You rock girl.
I hope you have a fabulous week.
Cheri
This is just fabulous. Great creative mind you have 🙂 Love the addition of the garland. Congrats!
Love this! Congrats on making the Top 10 ~ very creative project!
BEAUTIFUL and INSPIRING!!! Love it! I just used the harlequin pattern in my bathroom!! Let me know what you think! gentrilee.blogspot.com
p.s. I’m your newest follower! Saw you on Studio5 and LOVED it!
Congrats! That’s freakin’ awesome! The fireplace is AMAZING!
Really sharp and adjective fireplace. I really like it.Even I am also planning refurbish my fireplace. I hope that I will do so.
electric fireplaces
I have been trying to create a fake fireplace in my head. Thanks for the help. Now I just have to find the time.
just freaking amazing! We don’t have a fireplace in our house and I always miss it this time of year. Now I know how to rectify the situation! Thanks for the great tutorial!
So stinkin awesome!!!!!!
This is fabulous! I had a faux fireplace that we used for Christmas when I was a kid. I wish it looked as good as yours! Great job!!!
LOVE this!! I have an old faux fireplace that I painted white but not sure what to do about the middle, I love the idea of putting in Christmas lights and painting the back board a design! Yay!! So glad I found you!!! My husband thinks I’m crazy, he came home yesterday and I had two chairs I found at the curb, loaded them up in my suv and brought them home!! I was so excited at the possibilities!!!!! Yay! Now I have to go get my Krylon on!! Lol!!
i made a faux fireplace for my living room i felt like the wall need something so years ago i found the mantle at a discount stained it to a color i like use some stick on floor tile on wood and few things to go on top. Done
There are no words in the world for how unbelievably outstanding this is! You are soooooo talented! I want a faux fireplace! And the husband comment made me LOL!
So love the harlequin look! What a great idea. I want to do that to a wall.
My compliments to you again, what a great idea using cabinet doors to make a faux mantle. Why didn’t I think of that? Great craft idea. My name is Blue Wolf…
READ THIS PLEASE!!!
okay Seriously why aren’t you on HGTV Design Star? Have you seen that? It is my for sure fave show, and the winner gets their own show on HGTV. You would do so good, and I know you could do it, please think about auditioning next season. I love everything you do. I live my creativity thru you, so good job. Marianne
[email protected]
BRILLIANT! I have to do this!